Posted by: glasskeys | 12/31/2011

Happy New Year!

Referrer icons.

Happy New Year!

Exactly one year ago, I started glasskeys.com with a short introductory post. It is quite humbling to know that in just one year hundreds of thousands of people world-wide have visited this site. The image above contains a sampling of the page referrer icons that have linked to glasskeys.com during the year.

I sincerely wish everyone — regardless of race, colour, creed, or nationality — the very best for 2012.
Kindest regards,
Stephen

Yesterday I discovered that Windows 7 Starter edition — generally installed on lower end laptops and it’s ilk — isn’t as good at connecting to the Asus Transformer as the Win 7 Home or Professional versions I have used on other machines.

So what to do? Crawling the Asus website I found the easiest solution was to install a software utility called the Eee Pad PC Suite. After unraring the utility, running the installation file, and a quick restart (it is Windows after all), my knockabout laptop had no problems “talking” to the Asus Transformer tablet.

Follow these steps to get your basic laptop communicative with Android:

  • First, get the free 7-Zip utility used to extract the RAR file you will download.
  • Second, browse to the Asus download support page here.
  • Third, type the model number into the search box. This is actually the reliable way as the Select model manually option does not work on all browsers.
    If using…
      a Slider type SL101.
      a Transformer type TF101.
      a Transformer Prime type TF201.
    Click the search button.
  • You should see your tablet as a link at the bottom in the search results, click it.
  • On the OS screen select Android as the OS.
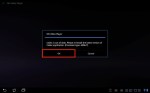
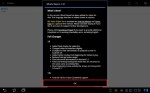
  • Finally you will be given a host of items to choose for download. Select Utilities, then select the Eee Pad PC Suite (PC version) file for download. The file will have a .RAR extension, and after downloading use the 7-Zip utility to extract. Upon extraction run the executable. After installation, restarts, ad nauseum you will be able to see your tablet in the system tray as you would any other USB device.

(Use the tag cloud at right to view similar topics. If you like this post +1 it!)

Posted by: glasskeys | 12/28/2011

How to thumb type on the iPad.

(To view a larger image with a more detailed description tap or click a thumbnail.)

Many are not aware that thumb typing is possible on the iPad. If using iOS 5 or later on the iPad, look for tiny thumb-ridges located at the bottom right section of the on-screen keyboard.

Push upwards on the ridges and the keyboard will split into halves, which can be repositioned further up the screen if desired. To recombine halves simply reverse the process and the keyboard will reintegrate itself with no fuss whatsoever.

(Use the tag cloud at right to view similar topics. If you like this post +1 it!)

(To view a larger image with a more detailed description tap or click a thumbnail.)

Although many in the business and computing worlds are turning to “cloud” based storage solutions, there are still needs to connect to “old-school” FTP file servers. Long a mainstay of the IT world, FTP as of late has been supplanted by the more secure SSH File Transfer Protocol or SFTP for short. So how does an iOS (iPad or iPhone) user connect to these servers? The answer is to use the extremely powerful app called GoodReader.

This application keeps getting better and better on each release and I consider it the number one “must-have” app for iOS users. Connecting to SFTP or FTP servers is as easy as connecting to Dropbox or SugarSync.

To start, open GoodReader, and tap the Add button in the Connect to Servers option found on the right side of the screen. In the Create new Connection list, select either FTP or SFTP server option. A dialog prompts you for all of the sign-in information necessary to connect to the server. When finished entering sign-in info, tap the Add button, keeping in mind to use a meaningful entry for the Readable Title field.

The FTP or SFTP connection recently added now appears as an entry in the Connect to Servers list using the chosen Readable Title for the list entry name. Simply tap the entry and GoodReader will attempt to access the remote server using the saved sign-in credentials. Once properly connected, any remote files and folders appear for perusal.

To download a folder and its contents, tap the area to the left of the blue circle, then select the download button in the bottom left of the bubble window. GoodReader then prompts for a save location, navigate your local iPad or iPhone folders until a suitable destination location is found, with a Download folder here button tap to “seal the deal.” GoodReader will then download the entire folder contents to your iPad or iPhone.

This process may also be reversed, and as an additional option GoodReader also supports syncing with remote FTP or SFTP servers.

(Use the tag cloud at right to view similar topics. If you like this post +1 it!)

(To view a larger image with a more detailed description tap or click a thumbnail.)

I use an Asus EEE Pad Transformer as my “main” Android tablet. However — I found that I was unable to view MPEG-4 (AKA MP4 or H.264) videos. That is when I discovered the free MX Video Player on the Android Market after trying a couple of different video player apps. If you do not desire to see the advert banner in the free version, you can opt to try the MX Video Player Pro which does not use advertisements.

Regardless of the version chosen, after installation open the app so that it may determine the compatible codec to install to match your tablet CPU and video hardware. You will once again be directed to the Android Market to download the free codec. For the Asus EEE Transformer the ARMv7 codec (at the time of this writing) is the codec MX Video Player selected as the best match for the tablet and video chipset.

Upon installation of the video codec, open the player once again, tap the OK button after reading the contents of the What’s new in version x.x dialog that appears one time upon a new installation or version upgrade. Navigate further by tapping the Movies folder and lastly select the MP4 video (if present) for viewing.

Your selected MP4/H.264 video will begin playing. You can tap the screen at any time to make standard video controls visible at the bottom of the screen.

Disclaimer: I am not associated or employed by any company producing software or hardware reviewed on this site.

(Use the tag cloud at right to view similar topics. If you like this post +1 it!)

NOTE: This tutorial has been made with Mac users in mind, as I usually present Mac specific information first, I decided to mix it up a bit and have already provided Windows specific instructions in an earlier post, so some of the material may be similar, but I have managed to cut a few steps, and I am using a different RAR software application in this tutorial version.

One of the most frustrating experiences in the world of tablet and mobile computing are the brick walls erected by cell carriers imposing “ad-hoc” limitations on the maximum file sizes permitted for download. This tutorial will not only show you how to bypass these limitations regardless of file size, but also on how to get around restrictions on maximum file sizes imposed by cloud storage providers.

As with every large tutorial on Glasskeys, there are a few prerequisite steps that needed taken before you “dive right in”:

For purposes of demonstration, I have on my system a video file, appropriately named video_file.avi, residing in a new folder called rarspot in Home:

Read More…

(To view a larger image with a more detailed description tap or click a thumbnail.)

If you are an owner of an ASUS Android based tablet, view the screen shots above for a step-by-step on how to connect, browse and safely eject a USB memory stick to the detachable keyboard USB slot. This technique also works for Micro SD cards – the slot of which is found on the edge of the tablet opposite the power button.

(Use the tag cloud at right to view similar topics. If you like this post +1 it!)

One of the most frustrating experiences in the world of tablet and mobile computing are the brick walls erected by cell carriers imposing “ad-hoc” limitations on the maximum file sizes permitted for download. This tutorial will not only show you how to bypass these limitations regardless of file size, but also on how to get around restrictions on maximum file sizes imposed by cloud storage providers.

This tutorial has been made with Windows users in mind, as I usually present Mac specific information first, I decided to mix it up a bit. Directions from a Mac perspective will be presented in the near future, and Linux users (hopefully Slackware linux) most likely will be able to figure out what to do once presented this page.

Keeping in mind that the directions in this tutorial are specific to Windows, as with every large tutorial on Glasskeys, there are a few prerequisite steps that needed taken before you “dive right in”:

  • An account with a cloud storage provider such as Dropbox or SugarSync will be needed.
  • Install either the Dropbox for Windows application, or the SugarSync for Windows client. Both are free and useful on Windows.
  • For your iPad or iPhone you must have the GoodReader app installed.
  • The cloud service selected above must be “visible” to GoodReader, so if needed you may wish to check out the Dropbox instructions, or the SugarSync instructions on how to do this.

The final prerequisite oddly enough is where this tutorial actually begins – determining if your Windows system is of the 32-bit or 64-bit variety, and using this helpful bit of info to select the appropriate RAR client to match. So click the Start button, Settings, then – you guessed it – Control Panel:

Read More…

Today marks the last day to get 50GB of free lifetime cloud storage from box.

To get the free storage, on your iPad or iPhone download the free app from the App Store, open the box app after installation, then register for a new account. You may also create the free account via your browser by clicking this referral link.

Disclaimer: I am not associated or employed by any company producing software or hardware reviewed on this site.

(If you like this post +1 it!)

(To view a larger image with a more detailed description tap or click a thumbnail.)

One of my earliest posts shortly after starting Glasskeys.com was a huge 5 part series on how to bypass the “Item over 20MB” download limit for iTunes podcasts if an iPad or iPhone is connected via 3G only (no Wi-Fi). Thanks to my love of Leo Laporte’s This Week in Tech podcast (I even have a TWiT brick), I was motivated to find a quicker method to download my beloved video netcast whilst using 3G. I then remembered my short ghttp trick post on how to modify an anchor tag URL to force the Safari browser to download a file directly to GoodReader storage.

Finally, putting 2 and 2 together, it becomes trivially easy to download content by copying a video link in Safari, typing the all important “g” character in an empty address bar, then finally pasting the video link after the g character. Hit the Go button and the netcast will then begin to automatically download in GoodReader, and strangely will not make a peep about the size of the video being larger than 20MB.

Please keep in mind if you use this trick often, your mobile carrier will happily charge you outrageous fees if you go over your monthly data plan limit. So again, please keep an eye on the number of bits you have allotted and remaining on your current monthly plan if you decide to use this technique. Consult the screenshots above for the “step-by-step”.

Incidentally, the next post on this topic – yes there is another way I have found to do this – bypasses both the mobile carrier file size limit and the limit that cloud storage providers place on maximum file size.

**************************************************
NOTE (05 Dec, 2011): As promised here is the other way, a technique utilising RAR files, from a iOS + Windows user perspective.

Update (11 Dec, 2011): iOS + Mac users will be shortly to follow click here for the RAR file technique.

(If you like this post +1 it!)

« Newer Posts - Older Posts »

Categories