-
- Illumination Software Creator page.
-

- Drag to Applications.
-

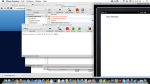
- Select window & Design Window button.
-

- Label & properties.
-

- Run App, with iOS-iPad as target.
-

- Xcode opens, click Build and Run button.
-
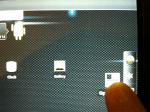
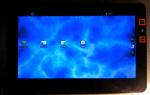
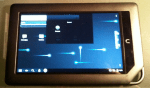
- View of Simulator window.
-

- My New Application on Simulator Home screen.
As an avid listener of the Linux Action Show podcast, I recently heard about updates to Illumination Software Creator which enables users to easily create simple applications for Linux, Mac OS, Windows, iOS devices (iPad & iPhone) and Android.
Illumination differs from most application development, in that it represents the building blocks of applications graphically, enabling a novice user to connect parts to one another without writing code. More information is available from the Radical Breeze intro page, tutorials, and forums.
Since the app is available as a free trial, I decided to give it a whirl myself. Installation is easy enough, and after dragging the app to my application folder in Finder, and then running it after install, I was shown a screen with a default application template that can used to build upon to create more complex applications.
I decided to add a lable to the first Window to create a fast “Hello World” type of application. I first clicked on the Window graphic block at centre of screen, and Design Window button to edit this window. This displayed a screen that I could choose common items such as labels, buttons and textboxes to add to the app window. I clicked the label option and then “drew” a label on the window with my mouse. A simple dialog at right let me change the name to lblEasy, caption to Kind Of Easy, and adjust the width and height properties. Alternatively, properties like width, height and the position may also be adjusted by simply clicking the label and using the mouse like one would in photoshop or a cell in a spreadsheet.
I finished editing the Main Window and clicked the OK button, then Run App button on the toolbar using Run iOS – iPad as the build target. Because of silly licensing and legal issues, the build must be opened in Xcode which Illumination Software Creator automatically and kindly opened for me. After XCode opened I clicked the Build and Run button on the app project toolbar, and the application displayed my text in the Simulator window as shown in the screenshots above.
Verdict: Because Illumination Software Creator can be used to deploy to multiple environments, it can be useful for professional developers to quickly develop the framework for prototypes and proof-of-concept apps, as well as the novice user that wants to build simple applications or explore programming concepts. Get it here.
Disclaimer: I am not associated or employed by any company producing software reviewed on this site.


I have been following the exploits of Rob Shoesmith shortly after seeing a tweet of his posted a couple of months ago. He will be camping out in the streets of London for the launch of the iPhone 5, but there is a catch: Anything he takes on his camping expedition has to be donated and he cannot spend any of his own money whilst on “expedition”.
He has an interesting story aside from his experiment, as he used to be a bin collector for his local council and now works for the app incubator company known as MEDL Mobile. One of their incubator apps – Jersey GTL was recently reviewed here on Glasskeys.
Best wishes to Rob on his experiment. See his webpage here and subscribe to his tweets: @shoesmith81.
Share this:
Leave a Comment
Posted in Commentary..., iPhone | Tags: fanatic, iphone 5