In the last part of our tutorial we left off with our full iOS file downloaded and residing in GoodReader’s My Documents folder. Today we will copy this huge file to our Mac, then backup our iPad before we update iOS.
First plug-in your iPad to its iTunes “home” computer. On most systems iTunes opens automatically when the iPad is plugged into its USB port. However each system varies, so you may need to open iTunes manually on your system. The screenshot below shows the iTunes icon in my dock:
This screenshot shows the summary tab, with the iOS version prominently displayed in the section at the centre of the screen. This image shows an iPad running Software Version 3.2, so it most definitively needs an update to version 4.2 :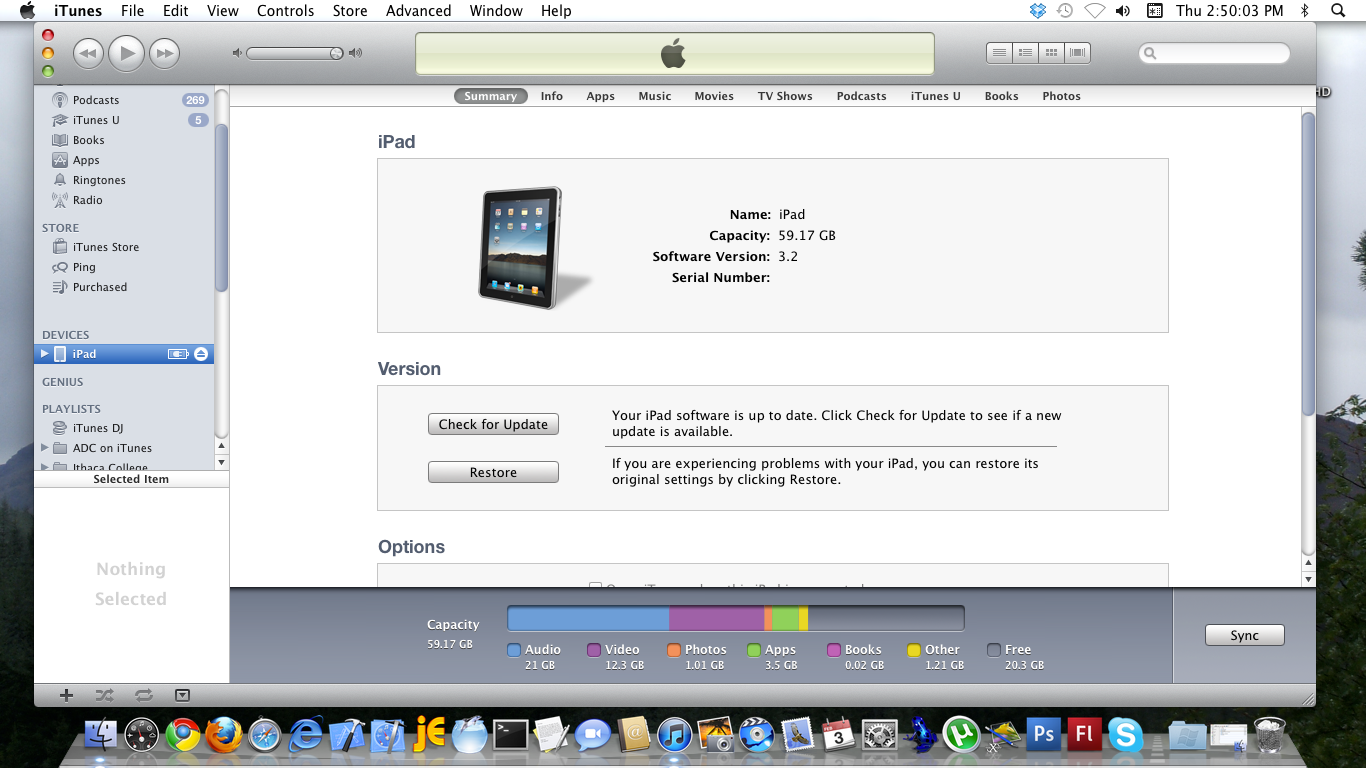
Upon verification that you actually need your iOS version upgraded, click the Apps tab, then using the scroll bar on the far right scroll until you see the File Sharing apps section. Click GoodReader, then note that the long “restore” filename ending with an ipsw extension is present in GoodReader Documents: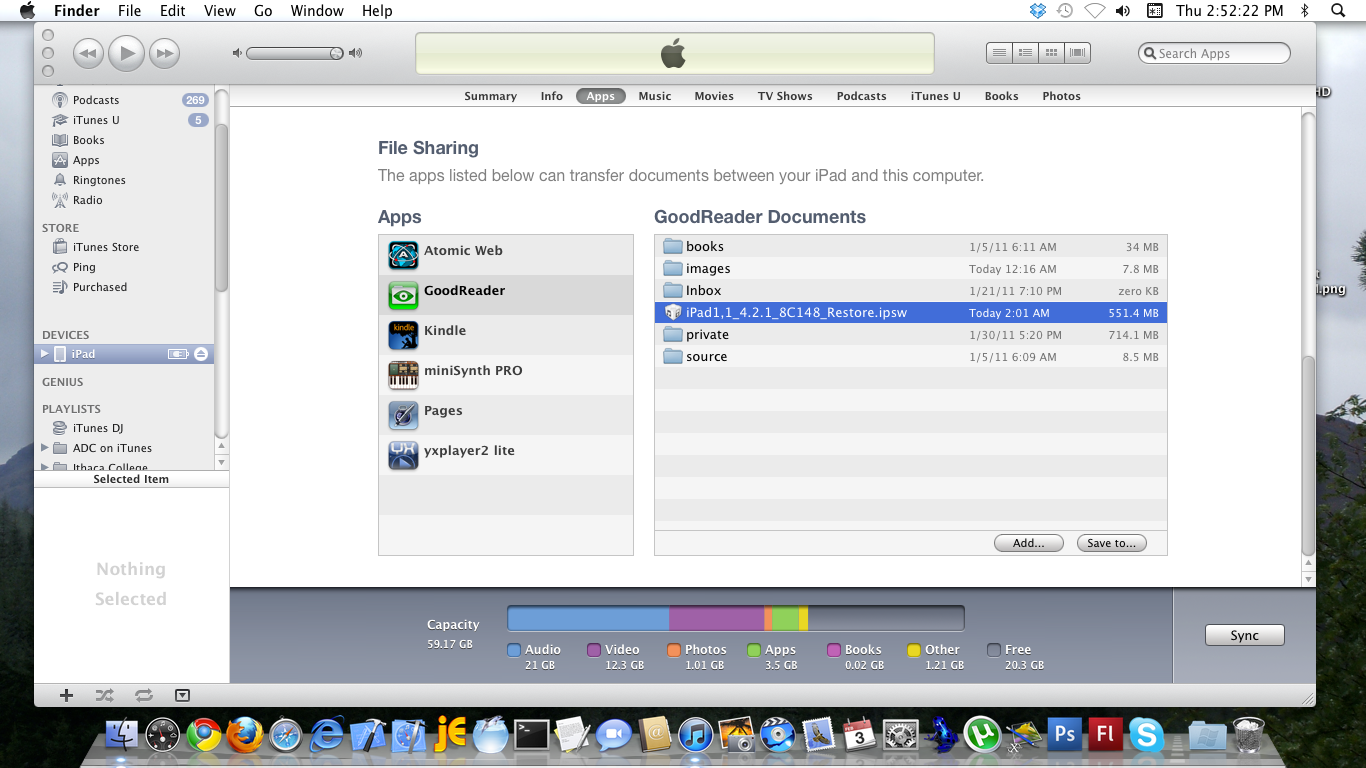
Click this long filename so that it is selected, then click the Save To… button. Choose a location to save this behemoth on your Mac, ensure you remember the location, because it will be needed for use with iTunes in the next tutorial steps:
Now wait a bit for this monstrosity to transfer from your iPad to your Mac: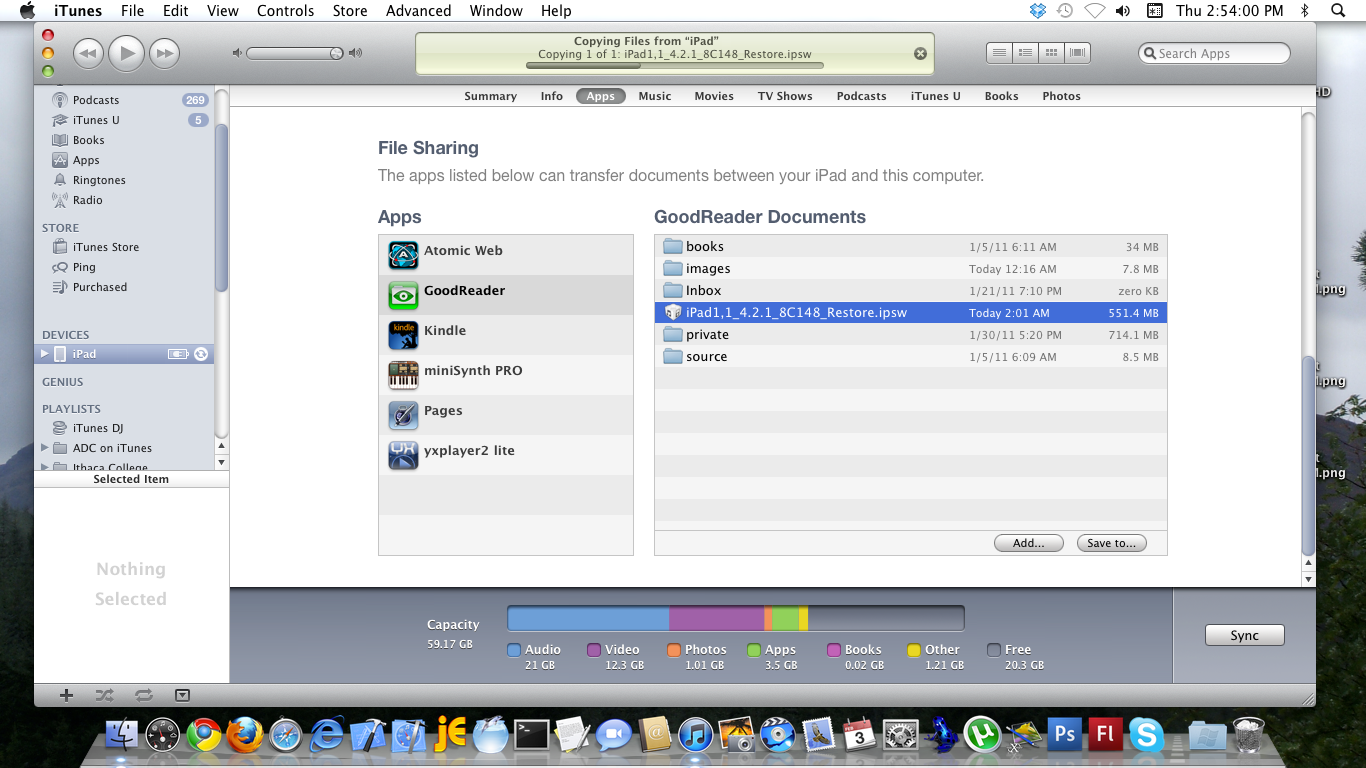
After the file is transferred to your Mac, return to the Summary tab, because your iPad needs a proper backup before we update iOS. Click the Sync button at the bottom right to start the process: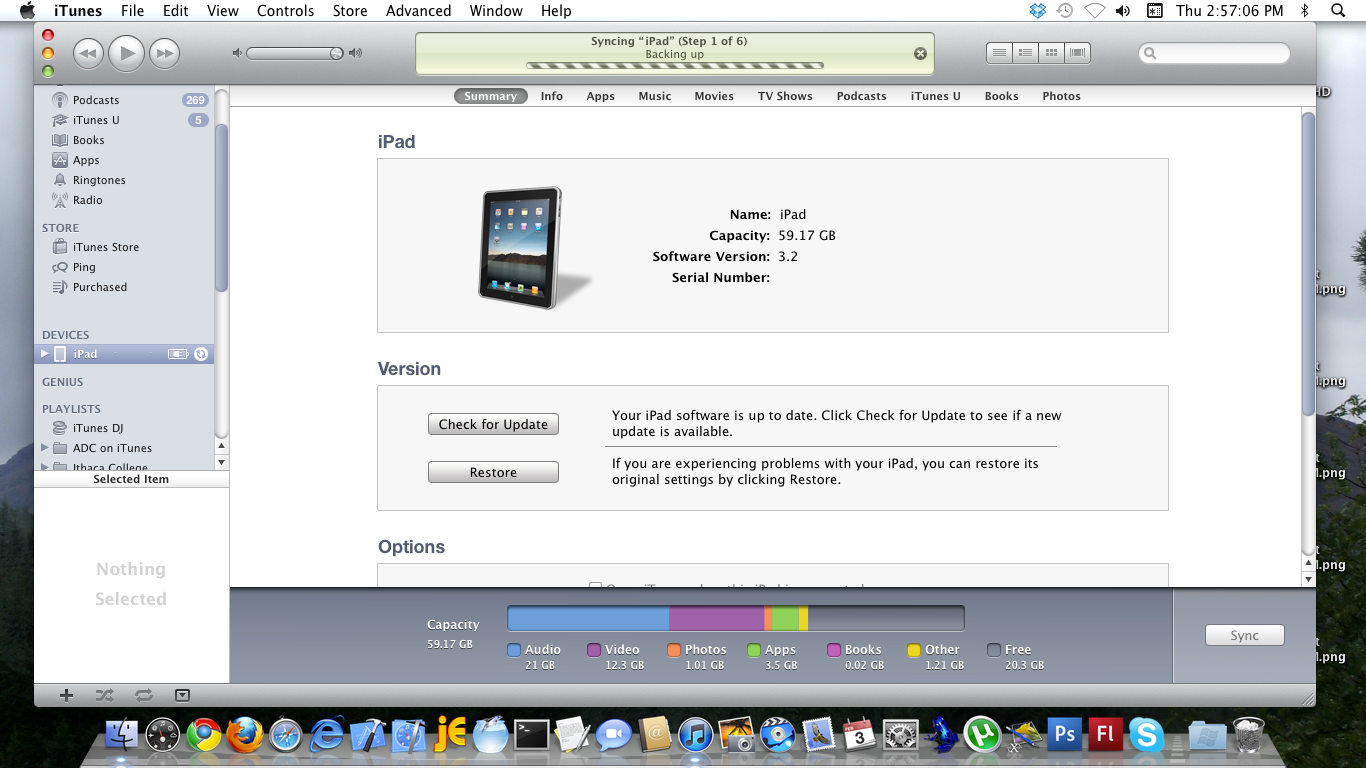
Steps 1 & 2 (backup, sync) will most likely take the longest of all the six steps of full synchronisation: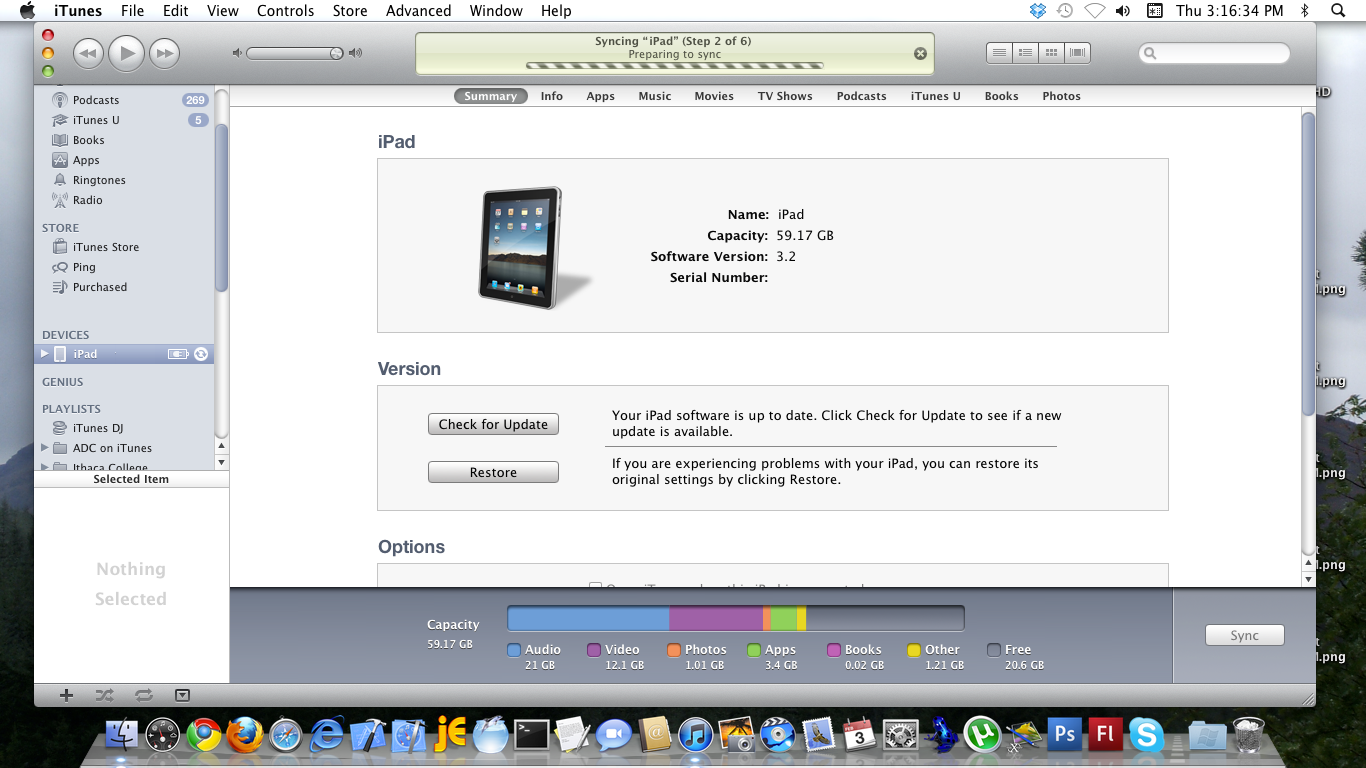
The remainder of the process (steps 3-6) proceeds at a much accelerated pace:
The next step we enable a tethered iPhone to use with iTunes verification, and I will show how to direct iTunes to use the ipsw file as the source of its iOS update.


Leave a comment