-

-
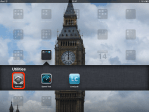
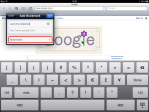
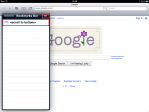
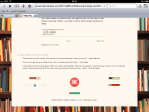
Running NVFlash from Windows.
-

-
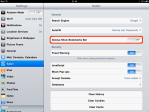
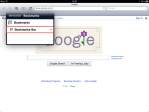
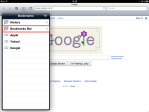
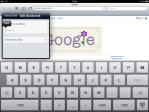
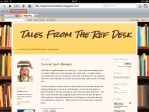
CyanogenMod 7 on tablet.
-

-
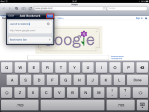
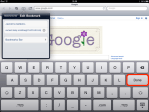
lsusb dump.
(To view a larger image with a more detailed description tap or click a thumbnail.)
I recently acquired a Viewsonic G tablet with the primary intention of using it to explore Android development. Although I was impressed by the initial interface, I found that the stock Viewsonic G tablet did not include access to the Android Market. At this point and juncture I decided to investigate how one would be able to install Android on a tablet.
I read about CyanogenMod and was told good things about it from a work colleague. Cyanogen is a ROM image that has been created by a group of dedicated programmers to (re)deliver the full functionality of Android OS to mobile and tablet users whose machines have had functionality removed by phone carriers and OEMs.
For example, mobile service providers in America are notorious for “hobbling handsets” and are motivated to to this so that they may charge extra fees for functionality that is usually included as a default feature by Google in the Android OS. They also have carte blanche to do this, since the US has weak consumer protection laws and politicians of all parties no longer even pretend they aren’t paid and work for powerful corporate lobbies instead of their constituents. So much for de-regulation and the free market.
The mobile service providers then “lock” the handsets to make it hard to restore the real OS, keep technical specs and documentation secret, and make it difficult for a customer to change the SIM cards on their mobiles — or all of the above. Many of these practices are of course illegal in Europe — especially in France where handsets must be sold unlocked.
A good example of this unscrupulous practice you may have encountered with your current mobile are any tethering fees imposed by your mobile company. This functionality is available by default (and free) in a non-crippled implementation of Android. For these reasons (and many others beyond the scope of this tutorial) many users decide they want to run the unbroken version of Android AKA “real Android” on their mobiles and tablets.
Since I use an iPhone (locked & un-jail broken BTW) for my mobile needs, I want to run as close to a stock version of Android on my new tablet for the purposes of software development. CyanogenMod provides the closest match for my needs, and decision made, I started reading the CyanogenMod Wiki to determine how to flash (install) this ROM image on my tablet. I quickly found information specific to my device, the “Viewsonic G Tablet: Full Update Guide”
Before installing CyanogenMod, the Wiki recommended that I download and install the ClockworkMod Recovery tool first. This tool gives you the power to determine what the machine does during “boot up”, and this ability is needed to redirect the machine to “flash” the CyanogenMod Android image to the machine. I then read the instructions in the section Installing ClockworkMod Recovery.
Next in the Flashing CyanogenMod section, I followed the Second Method (via Recovery) technique since I did not have RomManager and was unable to purchase this application using the built-in store that came stock with the Viewsonic G tablet. I used this ROM and this Google Apps file, and following the instructions to the letter, I flashed my ROM. All was well until my tablet became hung on the “Birds” splash screen after power on.
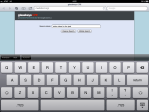
A bit of panic hit me: Did I brick my tablet so soon? It turns out others have ran into this issue before. So I downloaded and installed the NVidia tools here so Windows would see the tablet in APX mode, and the proper NVFlash images from here (I used the nvflash_windows_20100500.zip & nvflash_gtablet_2010110500.zip) and then followed the directions on this Android Forums page.
Now that my tablet was once again squeaky clean I followed the directions on the CyanogenMod Wiki page again as mentioned above, and now have a Viewsonic G tablet running Gingerbread thanks to the Cyanogen, XDA Developers and Android Forums communities.


I didn’t win the Facebook drawing unfortuately, but Asus now has a definitive list of locations in the US where you can purchase this tab for $399.
Share this:
Leave a Comment
Posted in Android Tablets, Commentary... | Tags: EEE Pad Transformer