Today I will describe the steps needed to install CyanogenMod on a bootable SD card for use on the Nook Color. The point of making a bootable SD card is that it preserves the stock install of the Nook Color (and your warranty). In plain English this means you will still be able to continue to purchase & share books, magazines, and apps from B&N, then when you want to use the Nook Color as an Android tablet you may “pop-in” the SD Card that has a bootable CyanogenMod 7 image.
This gives you the ability to purchase Android Market apps, use Gingerbread (Android 2.3), and lets you take advantage of the working bluetooth chip hidden from users and disabled on the hobbled flavour of Android installed by default on the Nook Color.
I read many sources of information and grateful for the information learned from members of these incredible communities: CyanogenMod Wiki, XDAdevelopers, and NookDevs. The install method I formulated is an amalgamation from information found on the Nookdevs and XDAdevelopers pages and forums.
Some prerequisites before you begin – first you will need a suitable micro SD card, I am using a PNY 8GB Class 4 micro SD card for my image, 2GB is too small and 4GB cards aren’t worth the bother. But according to this table you may wish to purchase a cheap Sandisk Class 2 8GB card for best performance.
Another hardware requirement is a way to write data to the micro SD card if your computer does not have a slot, the solution is a USB to micro SD adapter. Although I used an adapter that came bundled with another card I had purchased in the past, this and this were found on Amazon within minutes, these adapters are available at virtually all shops that carry micro SD cards, or usually bundled with a card as mine was. Cost is usually very cheap, especially if purchased online.
Upon procuring the necessary hardware, you will also need to download this short list of files:
- CyanogenMod v7.0.3 encore (stable) – found via this page.
- Version 1.3 of the “size agnostic” CM7 SD card installer – found via this page.
- Google Apps for CM7 found via this page.
If using MS Windows you may need two more extra applications Mac users need not be concerned with. The first is WinImage, and the second is 7-zip.
After the three files have been downloaded, place all of them in the same folder. If using Mac OS X, place the files in a new folder named cm7 in your home folder, and if using windows place the files in a folder with the path of C:\cm7.
Next, the file named generic-sdcard-v1.3.img.gz needs extracted. Mac users open the Terminal.app and type the following commands in the window:
$ cd ~/cm7
$ gzip -d generic-sdcard-v1.3.img.gz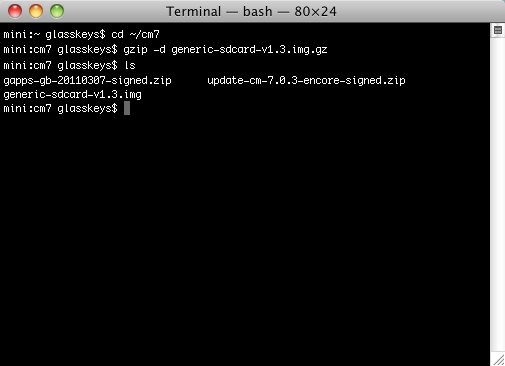
Windows users can extract using the 7-Zip application.
Now insert the card into the adapter and plug into a USB port and type this command into your open terminal window:
$ diskutil list
This is the result of the command ran on my terminal:
The diskutil list command is used to find the disk number of the sd card, the number is used to instruct the disk dump (dd) command to write a bootable partition table.
Based on the information listed, I determined that the /dev/disk3 entry on my machine matched everything I know about the sd card: the size (8GB), partition type (DOS fat 32 partition), and mount point, (I mounted this disk last). A good way to verify this is to run the diskutil list command immediately before and after inserting the sd card, comparing the tables to find the new entry that will be the number of the micro SD card. It is vital to know the correct disk number, because this information is used to write a new partition table on the card, effectively formatting it, so please double-check to ensure you use the right /dev/disk mount point number or the wrong disc will be formatted.
Run the following terminal commands on your Mac after you find the mount point, replacing /dev/disk# with the proper mount number:
$ diskutil unmountDisk /dev/disk#
$ dd if=generic-sdcard-v1.3.img of=/dev/disk# bs=1m
A screenshot of the commands in action on my system:
Windows volk need to use the WinImage program to write the generic-sdcard-v1.3.img image file to the appropriate micro SD card drive mounted on their system.
After the image has been written to your SD card, copy the update-cm-7.0.3-encore-signed.zip and gapps-gb-20110307-signed.zip to the micro sd card (NOTE: if you do not desire access to Google Market & Apps, neglect to copy the gapps-gb-20110307-signed.zip file). Do not unzip or extract them, simply copy the zip files to the root folder (no subfolder) of the micro SD card drive most likely named “boot”. Although the following screenshots are of a Finder window on a Mac, the same exact principle applies to windows users using Windows Explorer.
Copying the two files: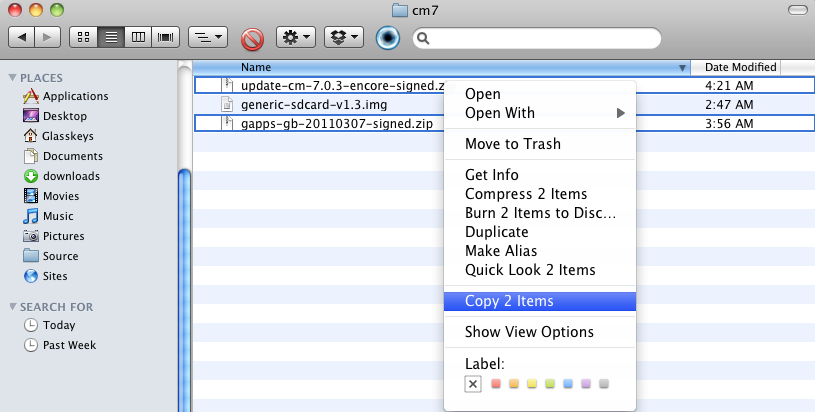
Pasting the two files:
Now you may eject the sdcard, ensuring that your Nook Color is powered completely off and insert the card in the corner slot of your Nook Color, turn on and begin to finalise installation of CyanogenMod 7.
This is the initial boot screen with a picture of the famous linux penguin that powers Android: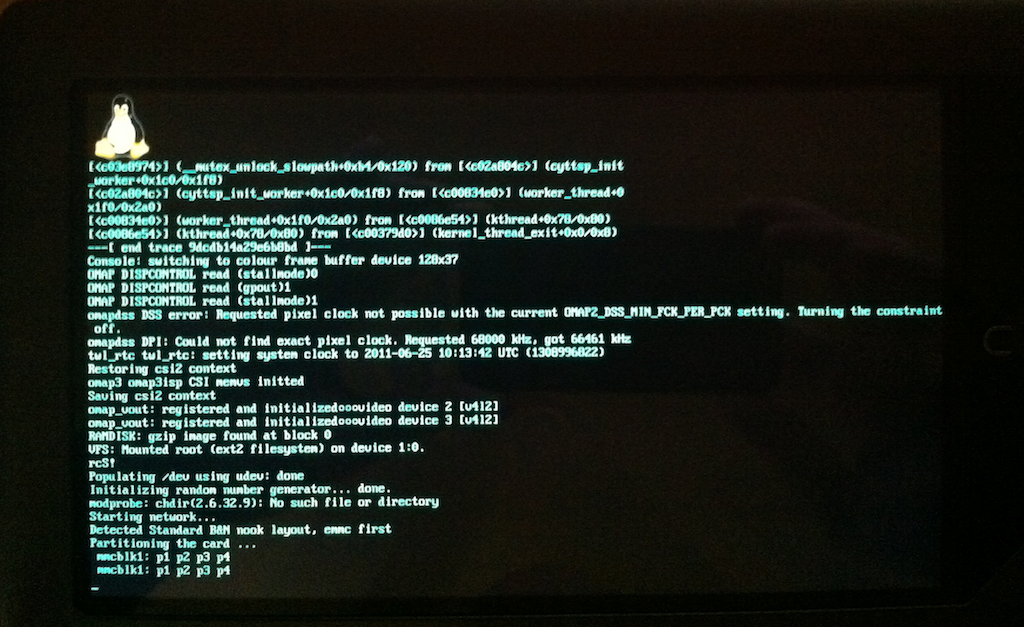
You may think that the system is hung at the Flushing caches step, this delay is normal on the first boot, shortly afterword the CM7 install will be finished and the system will power down. Turn your Nook Color back on, it will now boot CM7 and so you can setup your Google Market account: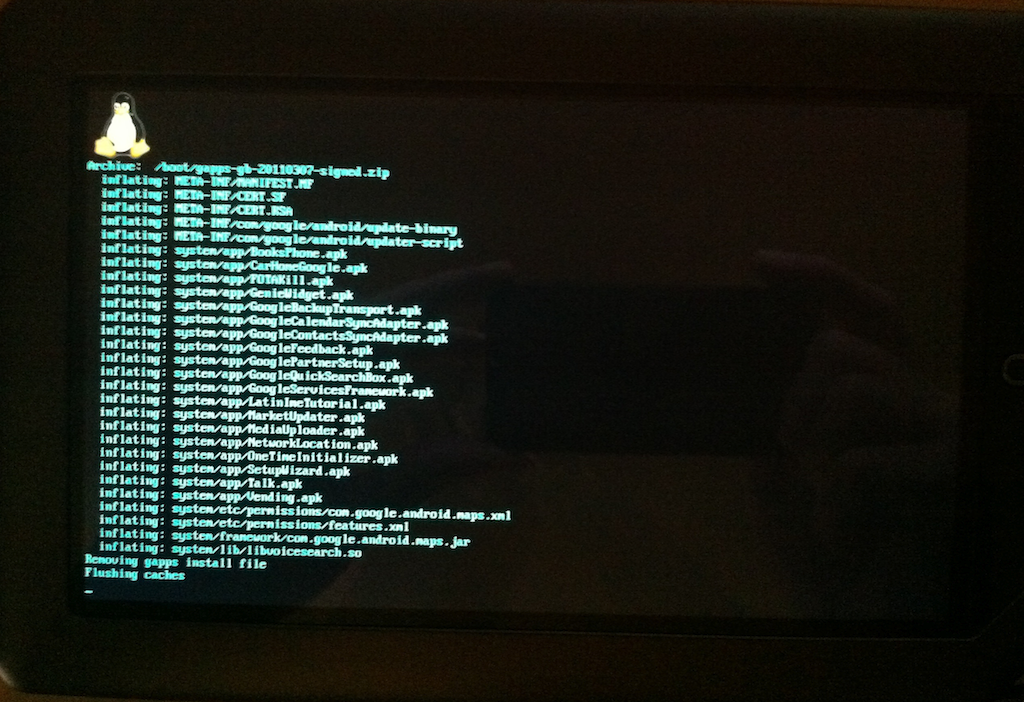
A welcome site to behold, the CyanogenMod 7 boot screen: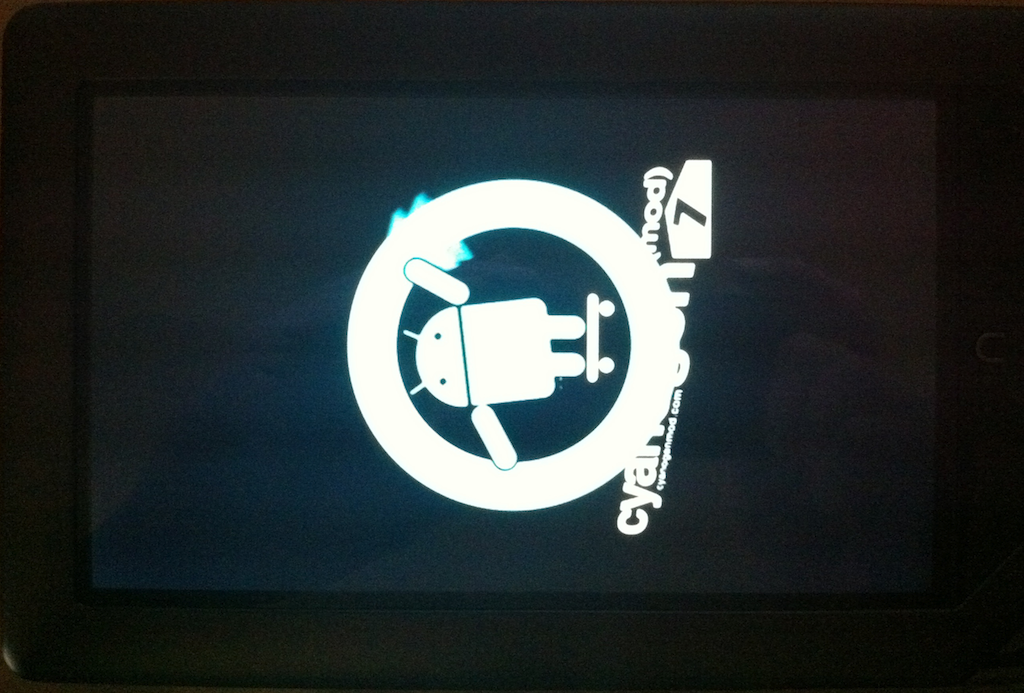
Touch the Android at the prompt to begin setup of the Google Market account: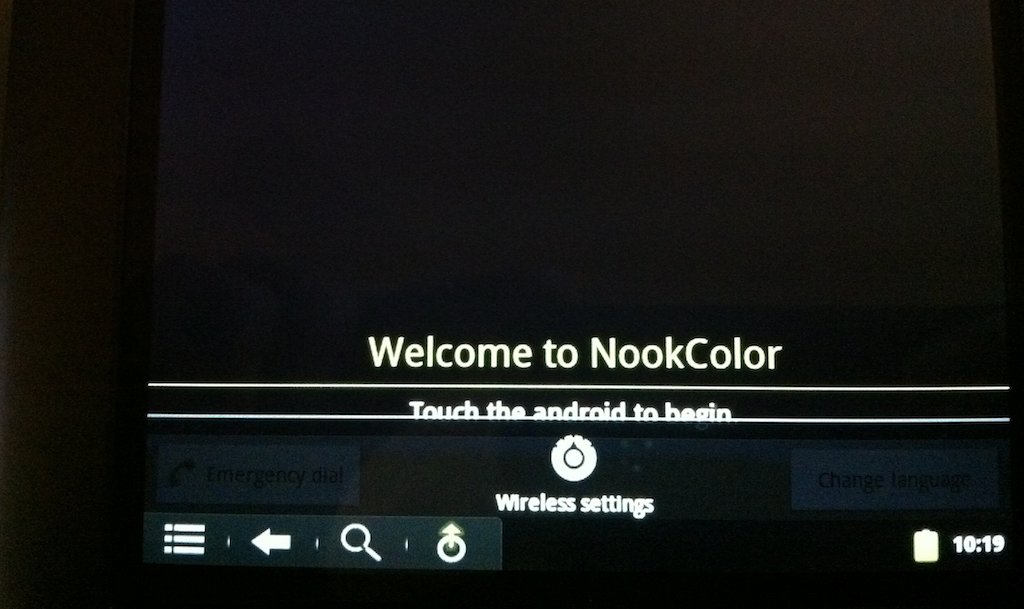
Enter your Google account information:
Because setup will be unable to contact Google to get your account information, you will have the option to setup access to your wireless router. Type your router key using the glass keys: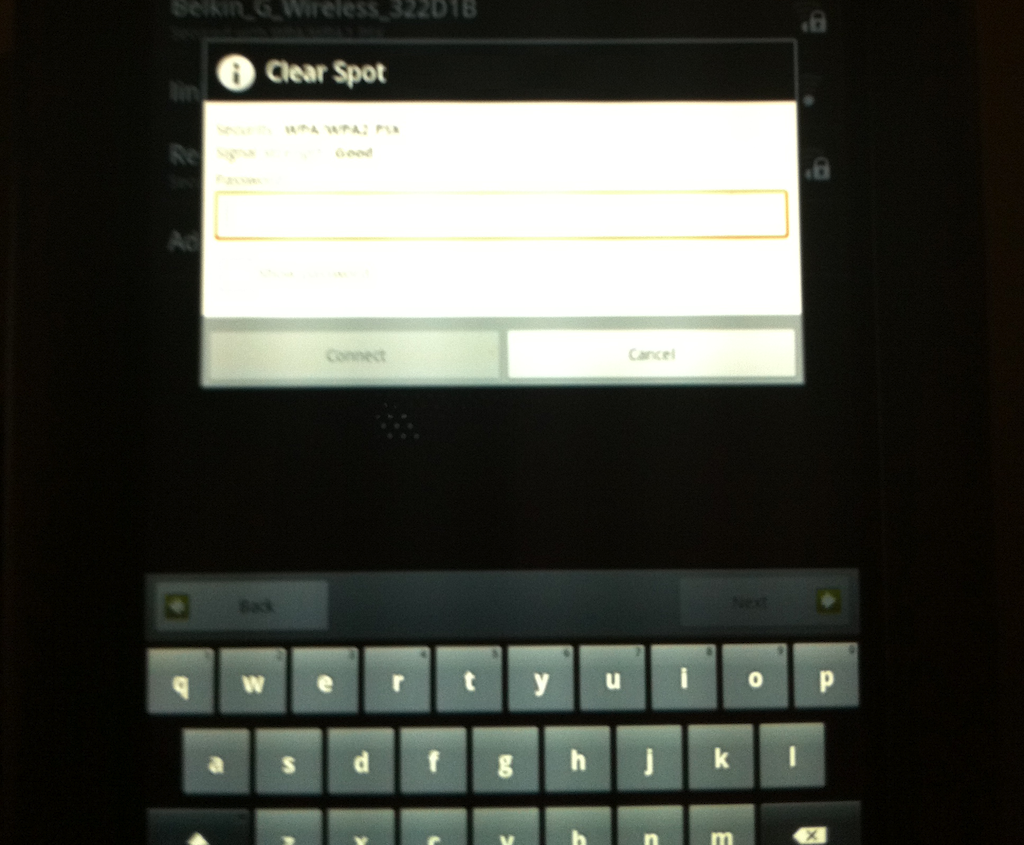
When you are done with Google apps validation/download, feast your eyes on the CyanogenMod desktop:
Last but not least, a universe of apps are available for you to use with an unhobbled Android OS, cheers to all of the people and tablet user communities that make this possible:


This was a fantastic step by step guide! My only questions are should I keep installing the nightly updates and how do you see all the apps that are running in cyanogenmod 7?
thanks a lot.
By: Syed on 07/01/2011
at 8:22 am
Syed,
If you tap the middle button on the small toolbar at right, that will display all of the apps you can run.
To see all of the apps currently running, you use the “real” buttons: ∩ button and -. When you pop out the sim card, the ∩ button and + buttons are used to take screenshots on a “normal” Nook.
Kind regards,
Stephen
By: glasskeys on 07/01/2011
at 8:41 pm
Thanks for the great howto. This was definitely the easiest setup I’ve seen. I’m up and running 7.0.3 and it looks great!
The only problem I’m having is that I don’t seem to be able to reboot into ClockworkMod Recovery mode. When I ask to update to a new ROM, it says it’s going to reboot into recovery mode to complete the update, but then it just boots back into CM7 normally without going into recovery mode. Any idea what I need to do at this point?
By: Scott Stanton on 07/05/2011
at 1:49 am
Scott,
I think this post answers the question direct and succinct, it can be *tricky* on the NC to do this (I am thinking of the Option 2 portion of the post when I say this):
Check it out:
http://www.inspiredgeek.com/2011/04/30/how-to-get-in-to-clockworkmod-recovery-mode-on-your-nook-color/
Cheers,
Stephen
By: glasskeys on 07/05/2011
at 2:22 am
So, I tried this, and I’ve actually looked at a couple of different tutorials; but with this one, the OS won’t even install. It simply says that there isn’t enough space in the boot partition. I am using a Scan Disc 4 GB class 4 Micro SD. I understand that it ought to work on a 4GB card and I want to see it work before I drop $30 on an 8 or 16 GB card I don’t need. There is another tutorial in which it will install and load to the boot menu. But then it just sits there (I’ve waited at least 12 min. before). Any thoughts?
By: Ghinao on 07/05/2011
at 11:53 am
Ghinao,
Try a couple of things:
1) Redo, but change the parameter bs=1m to bs=2m
2) Try without the Google install to determine if it is a free space issue.
3) Lastly if above options do not work try another SD card, some cards are a bit wonky.
Cheers,
Stephen
By: glasskeys on 07/05/2011
at 2:10 pm
I know this is an old thread, but I’m having the same problem with not enough space even though I have a 16 gb card. The partition it creates is too small. Here is the text from the diskutil list after I flash the image:
/dev/disk2
#: TYPE NAME SIZE IDENTIFIER
0: FDisk_partition_scheme *15.9 GB disk2
1: Windows_FAT_32 123.7 MB disk2s1
Any thoughts?
By: Derek on 05/20/2014
at 8:16 pm
Derek,
It doesn’t look like the SD card has been formatted correctly. It appears to have an extra partitiion.
Try removing the partition and reformatting again, then follow the steps, and it may work. Also keep in mind this tutorial applies to the original Nook Color.
Kind regards,
Stephen
By: glasskeys on 05/20/2014
at 9:29 pm
Thanks for the advice. Uh…which parameter needs changing, and how do I change it?
By: Ghinao on 07/05/2011
at 8:13 pm
By which parameter, I mean, where do I find it.
By: Ghinao on 07/05/2011
at 9:53 pm
Ghinao,
When you redo the steps & get to these lines:
diskutil unmountDisk /dev/disk#
dd if=generic-sdcard-v1.3.img of=/dev/disk# bs=1m
Try this instead:
diskutil unmountDisk /dev/disk#
dd if=generic-sdcard-v1.3.img of=/dev/disk# bs=2m
disk# being of course the appropriate number found with
diskutil list command.
Hope this helps,
Stephen
By: glasskeys on 07/05/2011
at 10:19 pm
Can I overclock the processor when running the CM7 via a bootable microsd card? If possible, it would make this tablet that much more formidable.
Regards,
Syed.
By: Syed on 07/09/2011
at 10:47 am
It appears that the Dalingren kernel supports overclocking: It is supported in three main flavours: 1.1 GHz, 1.2 ghz, & normal 800mhz. Then there is a experimental low-voltage version of the 1.1 GHz kernel.
By: glasskeys on 07/10/2011
at 2:15 am
Thanks for this, followed it step-by-step and booted my Nook Color with an SD card, leaving my Nook intact. Was really impressed with the speed of the card based OS. Thanks for this and thanks to all the folks who worked hard to make it available.
By: Cranni on 07/09/2011
at 9:38 pm
Cranni,
I agree that we all should give the members of those communities a big hearty pat on the pack. Thanks for reading.
Kind regards,
Stephen
By: glasskeys on 07/10/2011
at 2:17 am
I am having a terrible time despite following the simple instructions. What happens is that the initial boot from the sdcard fails in the install process. It goes into a screen with linux penguin on top, it adds a partition to the sdcard, it tells me about ~450 files it’s extracting from the zip. But when it tries to access the file ‘META-INF/com/google/android/updater-script’, which seems to do the next step of linking and permissions and setting up the boot to run CM7 etc, it declares that the file can’t be found. Then it helpfully deletes the zip file.
So the next reboot from the sdcard, it tries to do the first step of grabbing the CM7 files from the zip file again, but the initial zip file is gone.
The file exists in the zip archive. I’ve tried a bunch of stable and nightly builds. Same result no matter what.
I’m stumped.
Any clues? (yeah, I know this isn’t your problem, but I’m grasping at straws. My 10 year old is very keen to get her nook/android running)
By: Mark on 07/10/2011
at 4:13 pm
Mark,
Good one – or should I say bad one, you have me stumped. Usually when odd things like this happen, I try from square one eliminating issues.
Try either the whole process dd formatting, with recopy of image, etc. If that doesnt work, try a different card. What size are you using incidentally? One reader had probs with a 4 gig card.
Cheers,
Stephen
By: glasskeys on 07/10/2011
at 6:54 pm
This sounds very much like a dead sector on the media. I’ve had similar issues with USB memory sticks that had been overused, and of course, on hard drives.
Using mac osx, double click the image to mount it (we’ll pretent it’s at /dev/disk4, and the card is at /dev/disk3 still).
Then at the command line
$ cmp /dev/disk4/foo.zip /dev/disk3/foo.zip
If cmp finds differences, your card’s probably got bad memory.
By: William Hostman on 02/09/2012
at 4:34 am
This process worked great for me. Initially I felt that the browser was working slow. Installed App killer to kill other apps that were running, then the browser worked great too.
By: Sathish Goli on 07/11/2011
at 11:19 am
Thanks for the feedback & tip Sathish.
Cheers,
Stephen
By: glasskeys on 07/12/2011
at 2:32 am
Stephen, thanks for your prompt responses, i was fiddling around in the CM7 menues and came across the CPU processor settings. So could I bump this thing up to 900 mhz right within cyanogen, and if so does the voltage have to change?
thanks.
By: Syed on 07/14/2011
at 10:12 am
Syed,
Actually, I haven’t changed that setting myself yet. If you do decide to change it let us know what happened at least. :)
BTW, you and other readers that have commented in this post now have Google + invites. So check your inbox(es).
Cheers,
Stephen
By: glasskeys on 07/15/2011
at 1:02 am
Best tutorial that I have found for doing this. One thing that stumped me was how to use WinImage. Found the answer and I think it should be added for newbie’s like me. Thanks for a great write-up.
# For Windows users:
* Run WinImage.exe (Right click, Run as Administrator)
* Select Disk from the menu and select “Restore Virtual Hard Disk Image…”.
* Select your SDCard from the list and click OK.
* In the Open dialog box select “All Files” in the lower right file type box, browse to nookhoney.img, select, and click Open.
o Last warning, click YES to write honeycomb to the SDCard!
Read more: http://nookdevs.com/Nookie_Honeycomb:_Burning_a_bootable_SD_card
By: John on 07/17/2011
at 3:12 pm
John,
Thanks for the great feedback, real good Windows honeycomb install technique.
Cheers,
Stephen
By: glasskeys on 07/18/2011
at 2:29 am
The install appeared to work correctly and completed. The Nook powered down automatically. Then, when I pressed and held the power button the Nook would not power on (no sign of power on at all). When I remove the SD card the Nook will power on to the BN OS as expected.
By: phxnook on 07/23/2011
at 7:47 pm
Same for me. Except it completes and I turn it back on with the card in and it boots to BN os…
By: Anonymous on 06/16/2013
at 6:02 pm
Glasskeys,
Thank you SO MUCH for these directions. This was by far the easiest and clearest way for me to root my NC using my micro SD card.
By: Fooster7 on 08/02/2011
at 5:56 pm
No problems mate, thanks for reading.
Cheers,
Stephen
By: glasskeys on 08/02/2011
at 9:17 pm
I get through to the point the NOOK shuts down. Then I see the CM7 logo. But it doesn’t go any further. Instead the CM7 logo comes on. The arrow spins. Then it repeats. Never giving me the gmail option. Any thought? It has hung at this point after 4 attempts. Thanks!
By: KCAstroFan on 08/03/2011
at 8:44 pm
It seems to be the SD Card. I tried a SanDisk 4GB – went through the same steps – using the same Nook. And voila. It booted with no problems on the first attempt. It seems some SD Cards are finicky.
Appreciate the directions!!
By: KCAstroFan on 08/06/2011
at 8:42 am
great and easy to follow tutorial! thank you very much!
By: Juan on 08/04/2011
at 2:49 pm
Cheers! Thanks for reading,
Stephen
By: glasskeys on 08/05/2011
at 12:37 pm
Thanks!
I’ve been back & forth with every flavor of rooting. Finally nice to see one that let’s me keep stock!
By: Nexer22 on 08/05/2011
at 2:03 pm
Thanks for such clear directions !! Can you point me in the right direction to run netflix and hulu?
By: melanie on 08/06/2011
at 4:42 pm
Netflix is available on the Android Market here.
Hulu was found (Hulu+) here.
Thanks for reading,
Stephen
By: glasskeys on 08/09/2011
at 10:43 pm
Did everything above ran sd card in nook, installed and shut down. When i turned it back on, it says loading and then goes to a black screen that says android in the bottom left with a flashing underscript after it. Tried turning off and on several times. Same thing. Help!
By: Ryan on 08/06/2011
at 11:21 pm
Ryan,
What size/type of card are you using? That generally seems to be the unifying cause of most problems experienced.
Try a 8GB card if you can, and then try another brand of card or class if problems persist.
Cheers,
Stephen
By: glasskeys on 08/09/2011
at 10:45 pm
Worked perfectly! Thank you thank you!
By: Anonymous on 08/15/2011
at 1:10 pm
ShareTheWeb Hi I’m new to cyngenmod7 and I’m loving it, I will not go back to stock OS’s. I wanted to thank you for putting this together for the nook color. Everybody else makes this such a pain the neck. When it’s not if you have the proper guidance. Is there somewhere I can send a donation? I understand the hard work and dedication it takes to do these installs. People in general are clueless. Keep up the good work and live long and prosper.
By: ShareTheWeb on 08/16/2011
at 12:24 pm
SharetheWeb,
Thank you for the kind sentiments, if you want to help the tablet community with a donation, I would suggest donating on the XDA Developers site. Often times, money is needed for tablet tear-downs when a new device arrives on the scene, these tear-downs give the CyanogenMod and other dev groups info on chipsets, hardware capabilities, and other technical info required to take full advantage of hardware and/or helps to figure out an approach to get Android on a hobbled device. The Nook Color is a perfect example of this situation.
Cheers,
Stephen
By: glasskeys on 08/18/2011
at 10:51 pm
Worked great !, thanks a lot for an excellent job.
By: Anonymous on 08/16/2011
at 8:09 pm
No problem, my mysterious friend.
Cheers,
Stephen
By: glasskeys on 08/18/2011
at 10:51 pm
This worked for a month and then one day I tried to boot it and it kept getting hung up on the startup screen… any suggestions on how to fix this ?
By: melanie on 09/07/2011
at 8:15 pm
Melanie,
This has happened to me in the past, and the first time was my fault: I removed the SD card without a full power off. The second time I tried rebooting, etc — didn’t work. In desperation I tried the following and it happened to work — but keep in mind this is more voodoo in my opinion than anything.
1) Full power off.
2) Remove SD card image.
3) Power on – this will boot the “Stock” Nook.
4) After the Nook comes up, once again a full power off.
5) Reinsert bootable SD card and power on again.
This happened to work – although I know of no logical reason *why* it did. Like I said – voodoo.
Let me know if this works, in the meantime I will do a bit of investigation and see if someone else has experience/solution to this odd situation.
Cheers,
Stephen
By: glasskeys on 09/07/2011
at 9:43 pm
I tried that and it did not work…im thinking about wiping the sd cqrd and starting all over…it wotked for about a month before it wigged out
Melanie
By: Anonymous on 10/07/2011
at 4:20 pm
I had a similar experience. everything worked great for a while and then it would work but crash after @ 10 minutes. I did the wipe and re install and it is fine now. I am running Nook 1.3 and upgraded to the dual boot process (now I can switch back and forth with out taking the SD card out!
By: lisette on 10/07/2011
at 4:32 pm
How did you do the dual boot process? Never done anything like this before and have been reading all kinds of info…tried once but failed now I am getting the courage to try again but would like the dual boot process as I do like my Nook set up too.
By: Lori Maki on 10/17/2011
at 7:42 am
http://myraroldan.com/wp/
She has all kind of tips, scroll down to 8.20.2011 on the home page for the Dual Boot stuff. Really easy!
Lisette
By: lisette on 10/17/2011
at 8:25 am
Thank you Lisette…getting up the courage!
By: Lori Maki (@lorigruth) on 10/17/2011
at 2:34 pm
can you burn the SD card via Disk Utility? I am running Lion and when i tried to use the terminal window to extract the file it said ‘command not found’. I don’t know how to ‘find’ the file to give it the right path through the terminal window.
thanks
By: scott on 09/09/2011
at 2:43 pm
Scott,
Which command could it not find?
I ran the following commands on my system. The lines below the $ commands were returned by the OS.
$ which diskutil
/usr/sbin/diskutil
$ which dd
/bin/dd
Run both commands in terminal, if bash does not return a result under the command you type that means it could not be found and is missing.
On the other hand if you do see results you may just need to ensure the folders are in your path (should be already).
in your .bash_profile you would add a line like this.
export PATH=/usr/sbin:/bin:$PATH
But only do this if you need to.
In my opinion though, I think this is something the Lion install bolluxed up.
I hope this helps,
Stephen
By: glasskeys on 09/09/2011
at 9:38 pm
Thanks for the help but it seems I am not able to get pass the 2nd part (gzip -d generic-sdcard-v1.3.img.gz) I have tried too many times to count :(
By: Anonymous on 09/10/2011
at 6:32 pm
Thank you so much! I got it to work first time by following your directions to a tee. I love it!! You are awesome for taking the time to post this and share your knowledge.
By: Diane on 09/12/2011
at 11:29 am
I’m trying to get this to work and I thought I had but it told me there is an error with the pixel clock. (says I’m requesting 68000 but got 66461 instead) It also says lack of boot patricians. I’m using a 32gig transend 4 micro sd card, any suggestion?
By: Anonymous on 09/13/2011
at 12:23 pm
I am having a similar problem, not just with your directions but any! I can’t seem to burn to the SD disk with Lion. The message I get is “no such file or directory”
any ideas? I’ve tried with CM7 and with Nookhoney, no luck with either.
By: lisette on 10/04/2011
at 11:33 am
I got it to flippin’ work!!!!!! (doing serious happy dance!) The CM7 file needs to be in the home folder as in the users/folder with the dang house in front! I have been beating my head against a wall for 2 days!
Your instructions really are the clearest on the web!
By: lisette on 10/04/2011
at 11:55 am
Congratulations on your new CM7 install!
~Stephen
By: glasskeys on 10/04/2011
at 5:02 pm
I’ve tried different versions of the installer and CM but I can’t seem to get it to work. I see the word “error” a lot when it’s installing and when I turn the NC on I either get stuck on the looping CM7 logo or I get a black screen with a green dash on the corner. Can you help, please?
Thanks.
By: Sam on 10/09/2011
at 8:57 am
Sam,
I sent you a message, it may have been filtered. What are the particulars on card size, OS used, etc?
Regards,
Stephen
By: glasskeys on 10/14/2011
at 4:56 pm
Hi,
I am having the same problem with the looping CM7 logo after what looked like a successful install. Any ideas? I purchased a preloaded 8GB card, and it worked fine the first time before beginning the looping problem. I followed your directions and I am having the same problem now.
Thanks
Brian
By: Brian A. on 12/31/2011
at 3:09 pm
Thanks so much for the detailed instructions! Worked very well. Brilliant!
By: GeoffL on 10/13/2011
at 12:58 am
Geoff,
I am glad it was of help to you.
Cheers,
Stephen
By: glasskeys on 10/14/2011
at 4:55 pm
Hi, I followed the instructions for windows and when I tried to copy over the image, my computer requested me to format my SD card. I did this and shortly after I copied over the image and the update-cm-7.0.3-encore-signed.zip. When I put the SD card into my Nook colour, I got the linux screen, but it shows a message at the bottom of the page; “Error! Unexpected lack of boot partition on the SD card”. The next line says “Please report” and the one after says “Power off when ready”. I’m using a Sandisk 16GB class 4 card. The line before this error message shows “Detected standard B&N nook layout, emmc first”. I’ve deleted the files and reformatted the SD card twice already but haven’t been able to get it to work. The error message remains the same and it won’t go beyond this point.
By: Dammy on 10/15/2011
at 5:43 pm
I am having this same problem!!! ANY THOUGHTS??
By: Anonymous on 11/28/2011
at 6:18 pm
Hello I have the same issue. Anyone know what the fix is?
By: Anonymous on 01/22/2012
at 2:44 am
Add me to that list
By: Anonymous on 02/24/2012
at 9:57 pm
Do you have other links to the links that are not working right now …Version 1.3 of the “size agnostic” CM7 SD card installer – found via this page.
Google Apps for CM7 found via this page.
By: Lori Maki (@lorigruth) on 10/17/2011
at 7:50 am
Lori,
Thank you for the update…I have place a copy of the “size agnostic installer” on a publicly available Wuala folder. You should now be able to download it from there.
The link above has been changed to match this also.
http://www.wuala.com/Glasskeys/SizeAgnosticInstaller/
Kind regards,
Stephen
By: glasskeys on 10/17/2011
at 9:49 am
hmmm not all the apps are downloadable such as kindle and evernote…It says my device is not compatible for this item
By: Lori Maki (@lorigruth) on 10/17/2011
at 4:33 pm
I have the same problem. :(
By: Anonymous on 11/04/2011
at 12:24 pm
Well it booted, thanks to Stephen’s and John’s help. While it was booting, I finished the reading the comments, when i looked back, expecting the google signup, and it was booting the Nook software. Nothng seems to make it boot from the card, which Windoze recognizes as a boot disk with unzipped files. I used CM7.1, so I will try again with 7.03. I also noticed (in my wasted haste to get ahead) that there was a file overwrite of google apps and cm7 when I unzipped them on my laptop. I’ll post with further results. Thanks for your great step by step.
By: Mack on 10/18/2011
at 9:51 pm
Nice tutorial thanks
By: Anonymous on 10/19/2011
at 12:50 am
I have repeated this a few times and it’s just not working for me :(. I’m using a PNY 16GB Class 4 micro SD card to try this out. I also tried it out on a SanDisk SD that I had laying around (because it was in my phone), but I think the issue was its size (the SanDisk is only 1GB).
Could it be because I’m on Lion? Slightly different things happen in my Terminal Window to what it says in the instructions. I don’t know. That’s about the only thing I can think of at this point. I originally found this tutorial after finding one on a forum that uses Windows for the process. In that forum, they suggested that folks use a MD5 calculator to make sure that the files were not corrupted after download. I did that.
I’ve tried using update-cm-7.0.3-encore-signed.zip and gapps-gb-20110307-signed.zip like you did. I’ve also tried using the newer file types (the 7.1.0 and the 20110828) and neither combination have worked :(. I can’t think of what else to try now. Any thoughts?
By: Sophia on 10/20/2011
at 9:40 am
I FINALLY got it to work. Basically, I needed to get a new card – I read places that 16GB cards can cause problems with this process, so I got an 8GB card and tried it on that instead and it worked just fine :). I just wanted to come in and update instead anyone is having the same problem I was having. Follow the same exact step, just use an 8GB card instead of a 16GB. It worked without any problems at all.
By: Sophia on 10/22/2011
at 8:34 pm
do you have windows 7? I do and so I am not understanding since the screen shots were on a mac.
By: Laura on 10/22/2011
at 8:51 pm
I DO have Windows 7… but on my Bootcamp (which is what I would have tried if this last attempt did not work). But you’re wondering if I did this in Windows and no, I didn’t. And since you’re on Windows and looking for detailed instructions for Windows users, I hope Stephen doesn’t mind if I post a link to another blog on his site. If so, please omit that part – no harm was intended :).
Here is a step-by-step tutorial for Windows users. I hope that helps. The second one has videos even :).
http://www.anamardoll.com/2011/04/ereader-running-cm7-firmware-on-nook.html
http://www.anamardoll.com/2011/07/ereader-running-cm7-on-nook-color-from.html
By: Sophia on 10/22/2011
at 10:02 pm
As long as you are posting content relevant to the topic I see no problems. :)
Cheers,
Stephen
By: glasskeys on 10/27/2011
at 11:13 pm
Thanks for the great feedback Sophia!
Cheers,
Stephen
By: glasskeys on 10/27/2011
at 11:11 pm
No worries Stephen,
You’re welcome :)
By: Sophia on 10/28/2011
at 12:00 pm
UGH. I cant do it. I have a headache from trying. I wish I would have just bought the N2A card like I have read to. I tried doing what you said above. But I have no clue what is wrong. I dont see how to copy to the boot file of the SD card besdies just copy and paste method or drag and drop. Then I dont extract the 2 other files ever? I have all these files on my SD card but yet my nook color powers on to regular os as usual without any change. I just copy this over I used win image and sent over but that didnt help me.
I think Im totally clueless here.
By: Anonymous on 10/22/2011
at 8:47 pm
I have a PNY Micro SD Class 4 8GB. btw and im still lost…
By: Laura on 10/22/2011
at 8:50 pm
Hi Laura,
I fear that a 4GB disk might be too small for this. Try a 8GB instead, if you can get your hands on one. And again, be weary of a 16GB because those can have issues.
By: Sophia on 10/22/2011
at 8:55 pm
Hey Anonymous, what you have to do is “burn” the vi.3 file onto the card – not simply move it over. The step where Stephen runs these two operations:
$ diskutil unmountDisk /dev/disk#
$ dd if=generic-sdcard-v1.3.img of=/dev/disk# bs=1m
is what you’re burning the file onto the disk with. So, basically make sure that 1) you extract the file first and 2) you make sure that the correct disk number is being used (i.e. – when you replace the “3” symbols in the above code). Type carefully…. or just copy and paste the above code (which is what I did). Also, make absolutely sure that the nook is off before trying to install all of these files. Do that by turning it on, then holding the power button and waiting for it to ask you if you are sure that you want to power it off. I hope that helps :).
By: Sophia on 10/22/2011
at 8:54 pm
Look for johns to comment to understand how to use winimage to install the size agnostic boot package, I still haven’t tried cm7.1 without google apps or cm7.03 with google apps to see if it’s the overwrite issue or a me issue or a hardware issue. My understanding is that 4gb is enough to test it out but it won’t leave much room for anything else, but I haven’t gotten all the way through setup yet, so it’s worth what you paid for the info…..
By: Mack on 10/27/2011
at 11:25 am
I would imagine that 4GB would not be enough not merely because it does not give you a lot of room for anything else but more (or “also”) because those zip files get decompressed during this process and everything would simply run more smoothly on a little more space is all.
As for the imaging, I understand it to be basically the difference between copying the file ONTO the SD Card and creating a card that IS the files (if that makes any sense).
By: Sophia on 10/30/2011
at 7:03 pm
Anyone get this working with CM7.1 ?
By: Anonymous on 10/24/2011
at 11:14 am
Hi Steve, I was wondering whether the same process can be used to boot cyanogenmod 7.1 to the microsd card. Do you have to get a different size agnostic installer?
By: Syed Karamatullah on 10/26/2011
at 8:32 am
Syed,
I don’t know now — but I know what I will be trying this weekend. :)
For those reading this – the 7.1.0 CyanogenMod Syed is referring to is available direct from the CyanogenMod folks on this page.
Bloody hell, I had a nice little post in mind to create this weekend on how to view .AVIs on Honeycomb. Oh well. :)
Cheers,
Stephen
By: glasskeys on 10/27/2011
at 11:14 pm
Stephen, if you find a similar process for 7.1 then life will be grand! Please share as soon as you figure this out.
By: Syed on 10/31/2011
at 10:17 am
Syed,
Had a bit of work this weekend, trust me as soon as I am able I will let you know. :)
Cheers,
Stephen
By: glasskeys on 10/31/2011
at 10:39 am
hi!
i need some help. After inserting the micro SD card into my nook, it flushed the caches and all that. The only problem is, it stopped saying “not enough storage”… what should i do?
By: Arvin Matic on 10/28/2011
at 9:09 am
I would try using a slightly larger Micro SD card. It sounds like you perhaps were trying on a 1GB or a 4GB. You should be absolutely fine with trying things out on a 16GB – that size seems to be the safest (for its price) overall. Amazon has cheap deals for 16GB options. I hope that helps :)
By: Sophia on 10/30/2011
at 7:14 pm
Make sure you have the same version of the cm7. I tried using the newer version of cm7 (7.1.0) and got the same error. I tried the one in the instructions 7.0.3 and it worked fine (go figuire :))
By: pathfndr on 11/18/2011
at 10:25 am
i know it is almost 7 years too late, but thank you @Sophia and @pathfndr for the advice.
By: Arvin on 07/21/2018
at 8:12 am
Stephen,
Thanks for a great post. Process worked fine. I was tempted to try 7.1, but I just installed 7.0.3. to start until I see how your weekend goes. I am finding a number of apps in the Market say “Your device is not compatible with this item”. Do you have any types to avoid this issue? There are several apps I want to use that I can’t download via market. I worked around one by using a beta and side loading, but I’d really like to figure out how to use the Market directly with this install. Maybe 7.1 will have less compatibility issues?
Thanks for all your help.
Brian
By: Brian on 10/28/2011
at 7:17 pm
Brian, I had the same issue, and I just downloaded the .apk files for the incompatible apps (google maps, adobe flash 11 etc.) and side-loaded them onto the nook color.
By: Syed on 10/31/2011
at 10:14 am
Syed,
Found a workaround to the Market issue at:
http://myraroldan.com/wp/2011/09/your-device-is-not-compatible-with-this-item-annoying-android-market-message/
It did work for me, but it appears to not hold, as after a while I started getting the message again. I’m not sure if the setting doesn’t hold after reboot, so you have to repeat or if it just isn’t the ultimate solution. I can’t always seem to find the apk files for all the apps I want, so hopefully the Market issue goes away soon.
By: Brian on 10/31/2011
at 7:34 pm
Okay, I have a question.. I got CM7 installed and loaded.. it goes to the CM7 home screen, underneath it says “Loading”, then it just goes to a black backlit screen. That’s it. I’ve tried rebooting.. not working… any ideas?
By: Amber Cates on 10/30/2011
at 3:51 pm
Also, my microSD is an 8GB Sandisk and, for some reason, when I write the image to the SD card, it creates two partitions on my SD card. One is about 130 MB (where everything is being saved), and the other is unallocated and inaccessible at about 7.2ish GB. After I write the image, I use EASEUS Partition Master to basically merge the two partitions and then copy the Android OS over.. I’ve been using the size agnostic SD image because I can’t find one that’s specific for an 8GB.
By: Amber Cates on 10/30/2011
at 8:50 pm
Hi Amber,
It’s normal that the writing process does that. There is no need to then go in there and adjust the allocations because, once everything is set up, the Nook will read the remainder of the 8GB on the Micro SD just fine :). Perhaps the EASEUS step is what’s throwing things off slightly? The fact that you get to the CM7 screen shows that you’re following the steps just fine. I’m not sure of the Class of it, but I’m also running things from an 8GB Micro SD so you should be just fine with the card itself. That’s why I think it’s something to do with the process. Try reformatting everything and starting from the beginning and seeing if that works out (it should). :)
By: Sophia on 11/01/2011
at 11:14 pm
That’s what was happening to me when I tried to load everything onto a 1GB Micro SD card. I think that may be a space issue. It MIGHT be having a problem with trying to decompress the other files (Or, at least, that’s the impression I got with it) and that then makes the process hangs near the end of the install.
By: Sophia on 10/30/2011
at 7:18 pm
Thanks for doing such a great step by step for ignorant folks like me! I am having trouble – when I try to unzip the installer, it tells me there is no such file or directory. Furthermore, the file itself does not appear to be zipped anyway. At some point I got it to write to the disk anyway, and then when I inserted it in my Nook, it tried but said the initial install files could not be found. It told me to get them at nook.linuxhackers.ru, which Safari could not find.
Any ideas? Thanks!
By: Connie on 10/30/2011
at 11:45 pm
Hey Connie,
I was previously getting that linuxhackers.ru message too at one point. I have no idea why that kept coming up. In the end, what I did was reformatted the card and kept trying again and it went away so that’s part of how I knew that actually, I was doing the steps correctly overall. Finally, I tried a new card and things worked out for me. Is that card an 8GB, by the way? Also, so you know, it is possible (and probably easiest) to use the Nook itself to reformat the card if you want to start over from scratch.
Now about the unzipping. I forget which browser (I think it’s Safari), but when you initially download the files, the browser AUTOMATICALLY unzips it – a feature that I guess is SUPPOSED to be for convenience. I am assuming you are on a Mac because that was happening to me on a Mac and it doesn’t seem like a Windows habit. So, what I would suggest is using a different browser for the download. If Safari IS the browser that’s doing it, then I can safely say that FireFox is safe (and vice versa). I use three browsers on Mac – and Chrome is one that I am absolutely sure keeps things in tact (figured I’d mention that too).
I hope all of that helps :)
By: Sophia on 10/31/2011
at 11:07 am
Thank you Sophia! I used Chrome to download them and that worked wonderfully! Everything went great until I tried to turn the Nook back on – it won’t turn back on! I take the SD card out and it works fine with the stock OS. I tired 2 different cards, one a 4G and one 8G and both did the same thing. And yes, I am using a Mac. Any ideas? Thanks for your help!
By: Anonymous on 10/31/2011
at 9:46 pm
I’m glad the Chrome suggestion helped. What I now suggest is this – reformat the 8GB and try again following the steps above. The fact that you got past (what I’ll call) the “Penguin scroll” part of the process shows that you properly completed all of the steps needed and that there’s just one little glitch here or there to work through… and that you’re ALMOST there :).
Make sure your Micro SD card is plugged into your Mac. Next, hit Command + Space and type to search for the “Disk Utility” application. When that comes up, the Micro SD drive will show up on the left side of the screen – select it (the top-most/main option). On the right side of the screen, you’ll see First Aid | Erase | Partition |… Choose “Erase”. For the “Volume Format” option, choose “MS-DOS (FAT)”. As for the name, that won’t matter because the process will change its name anyway (after the “Penguin scroll” part). Then click “Erase” at the bottom.
Doing that will format the Micro SD card. After that, follow the steps above. Now here is a word of caution. When you are writing the 3.1 image onto the card (that section after typing “$ dd if=generic-sdcard-v1.3.img of=/dev/disk# bs=1m” into the Terminal, make sure you wait for the write to finish. You will know when it is finished because the screenshot that Stephen posted will come up. That seems a simple thing, but after having done it a few times, there MAY be the urge to speed through the process at this point and it is possible to lose site of the minor things to wait for. I’ve made that mistake one time (just going ahead after a minute or so, then later realizing that actually it had not finished before I ejected it). So that’s why I caution you :)
By: Sophia on 11/01/2011
at 8:00 pm
I am having this same issue using a mac on and ADATA 8GB Class 10. Have formatted and re-installed a few times.
By: winklebleck on 11/04/2011
at 8:15 pm
Hi winklebleck :),
Which issue are you having? The one where you can’t unzip the installer file or the one where you are getting the message with the nook.linuxhackers.ru URL in it?
By: Sophia on 11/05/2011
at 9:39 am
Is there a preferred way to upgrade to cyanogen mod 7.1? Is it possible to upgrade and not lose any data stored on the sd card (i.e. audio files that I downloaded using the device.)
By: jb on 11/02/2011
at 10:35 pm
Hi, thanks for the detailed instructions. I ended up following Myra’s one but I also crossed reference to your post as it had a lot of other details on it. I also read most of the post and the issues others were having, It took me 3 attempts and 2 laptops before I finally got mine to work. I used 8gb Sandisk card as I read that other sizes and brands could have issues. When I got it to work (finaly) I tried dowloading some of the apps that I have on my smartphone, but I did get a message on Angybird Season’s that my tablet is not compatible, which really dissappointed me as well as the Rockplayer. I hope a solution can be found. Thanks again for all the help!
By: Anna on 11/04/2011
at 8:42 am
Okay, I got it working and everything looks great, thanks for the tutorial!
But does this process allow me to dual boot to the nook os?
And related to jb’s? question above how could I upgrade to 7.1?
Thanks
By: Alex on 11/09/2011
at 9:08 am
Alex,
Be sure do do a full Power Off (hold down Power Key, then power off in menu), then you may take out the SDCard and thereby booting into “stock Nook”.
Cheers,
Stephen
By: glasskeys on 11/09/2011
at 9:19 am
Right, I did that and it worked. Is there a way that I don’t have to remove the SDCard?
By: Alex on 11/09/2011
at 2:28 pm
Hey Alex,
I am far from an expert in all of this because I’ve just been playing around with it only over the past few weeks total. With that noted though, it seems to me that… in theory, yes, because they’re both grounded in Android. But, the way I understand things, the only way to be able to get close to being able to do something like that would be to somehow lay the Nook’s custom OS’s files over Android somehow. That’s (again) PROBABLY possible, but probably too tedious of a task to be worth it in the end. I mean, when the alternative is merely taking the MicroSD card out, I’m sure that is not an area of an already small area that folks are working on tinkering around with to find solutions to problems like that one. Just my two cents :).
By: Sophia on 11/09/2011
at 5:17 pm
I’ve got to the part after it flushed the cache and powers down but when I turn it back on it starts the shutdown process again. Does anyone know why it’s doing this? Thanks and excellent tutorial.
By: george on 11/11/2011
at 12:30 am
I’d also add that the nookcolor has an SDHC controller and will display attached SD cards as separate disk drives in USB mode connected to a computer (at least under windows). So as long as you have the USB data transfer cable, you don’t need any additional hardware to write to the SDHC card.
By: Anonymous on 11/11/2011
at 12:51 am
Hi
when I use Winimage to burn generic-sdcard.img on my Transcend microsdhd 8GB I get : “the current image format is not supported by the disk drive F , it will be resized” I click ok and it is writing the files on my microsd and their size is the same as the original files, I copy cm7 and google app zip file to the sd but inserting the microsd to the NOOK does not work , it boots to NOOK .
what seems to be the problem ?
By: Glass Rafi on 11/14/2011
at 1:49 pm
Hi Glass,
I’m not sure what the issue could be but have you tried Ana Mardoll’s instructions? They’re specifically for Windows is why I ask, and that might be helpful because it seems that there’s something going wrong along the way that’s prompting the software to ask you to resize everything. Or perhaps that’s normal but we’re meant to decline the offer? I’m a Mac user, but I wanted to give my two cents and post the links again to the Windows instructions. I hope that helps :).
http://www.anamardoll.com/2011/04/ereader-running-cm7-firmware-on-nook.html
http://www.anamardoll.com/2011/07/ereader-running-cm7-on-nook-color-from.html
By: Sophia on 11/14/2011
at 6:38 pm
Hi,
After following the steps up to when the device turns off automatically, my Nook won’t turn on again.
Does anyone know how to solve this? I tried restoring my nook to fctory settings, but still not working.
thanks!
Felipe
By: Felipe on 11/15/2011
at 9:17 pm
What sizedcard are you using Felipe? And by ” I tried restoring my nook to fctory settings”, did you mean that you removed the micro SD card? Taking the card out and restarting with it removed SHOULD solve that problem and allow you to start again from the beginning.
By: Sophia on 11/15/2011
at 9:46 pm
Hi Sophia,
I tried a 16GB card. I had my Nook rooted, so I restored it to factory settings after the issue. I did remove the card to do so, since it was the only way it would turn back on.
I tried again and still got the same result.
thanks
F
By: Felipe on 11/16/2011
at 11:52 am
Hi,
Thanks for the great info, and your patience helping people out. I’m following your procedure with 7.1.0-Encore and it seems to complete the process correctly – I get the pause at ‘flushing cashes’ and then the device powers down. But when I power back up, it just boots into the stock Nook firmware (the first thing I see is ‘Read Forever’, just like I didn’t have an SD card in there). I’ve tried this three times now with two different cards (an 8GB and 16GB). I’ve tried writing the image using both WinImage and win32diskimager. My nook is a refurb with 1.2.0 firmware.
Any idea what’s going on?
Thanks,
Jay
By: Jay K on 11/16/2011
at 1:17 am
A similar thing was happening to me. What finally worked for me was when I followed everything exactly (i.e. – using 7.0.3 instead of the newest version) and that solved it. I had figured “Hey, if it worked back when Stephen first did it, then why not?”. Also, I’m on 1.3, so it SHOULD work on 1.2. Try using the 8GB and 7.0.3 and see if that helps.
By: Sophia on 11/16/2011
at 1:52 am
I figured it out. It looks like CM7 + the apps file has gotten too big for the partition that gets created when the generic-sdcard-v1.3 image is written to the card (~115MB). After writing that image, I used the free EaseUS partition manager (http://www.partition-tool.com/download.htm) to resize the partition… I made it 200MB (since this is a 16GB card and it doesn’t matter), but I doubt you’d have to go that large. Anyway, after this step, I copied over the two .zip files, put the card in my Nook, and everything worked.
Now that I think about it, once time during the original install (before I resized the partition), I think a message about running out of disk space was printed out, but it flashed by pretty quick. It probably ran out every time I tried this but I just missed it.
PS: This link provides some info on what do to after first-time start-up: http://www.androidtablets.net/forum/nook-color-technical/13156-how-cm7-bootable-sd.html.
– Jay
By: Jay K on 11/16/2011
at 2:14 am
This is real good info. Thanks for the feedback Jay. I am also thinking that the technique you implemented could be saved to match the two sizes of cards, 8GB & 16GB image files for use with versions newer than 7.0.3. I could place them up on Wuala like the other file.
Cheers,
Stephen
By: glasskeys on 11/16/2011
at 1:02 pm
Huh the Cynagen download page seems to be down, just when it was too cold to do anything outside. Has anyone got a mirror site for 7.03? Hopefully it will be up soon.
By: Mack on 11/17/2011
at 10:26 am
Mack,
Thanks for the info mate. I am going to place that file in a Wuala link as well so we don’t use up CyanogenMod.com bandwidth.
Cheers,
Stephen
By: glasskeys on 11/17/2011
at 10:41 pm
I have now changed the link above and placed the file on Wuala, its also a bit faster.
Here is the direct download link.
By: glasskeys on 11/17/2011
at 11:11 pm
Having the same problem as George.. after everything seems to install it then shuts down corectly i think.then every time i power back up it goes through a couple of seconds of finishing up saying card is formatted for boot up,but after it powers down i get the same finishing up, card is ready powering down.
By: jeff on 11/19/2011
at 7:44 pm
I was finally succesful with the process but only one problem… when I tried to download facebook for android it tells me that its not system compatible
By: Anonymous on 11/20/2011
at 9:30 pm
Change the screen density from 161 to 160 and it will work. I had the same problems with Facebook and other apps. There is an app that comes with the conversion. Launch it and change the density to 160 then download the apps. Facebook still crashes, but that is the only one.
Scott
By: Scott Doyle on 11/21/2011
at 9:48 pm
Stephen,
My Nook Color is now a tablet!! Thank you. I followed your directions and the only thing I had to change was the screen density from 161 to 160 for some of the apps to work. This was awesome!!
Thank You!!
Scott
By: Scott Doyle on 11/21/2011
at 9:45 pm
Thanks for the great how-to. Everything is working great for me, but I would like to add movie and music files to the SD card which is showing plenty of space. When I try to add files I get a message saying there is not enough room on “BOOT”. Should I have partitioned the SD card before install?
By: Brian on 11/23/2011
at 8:54 pm
The only problem I am having is that some important apps won’t download because the market says they are incompatible with my device – Pandora radio and Facebook for example. How can I fix this?
By: ec on 11/23/2011
at 11:14 pm
i am having the same prob,ec, i think that the cm7 ver 7.1 .0 from 10/10/2011
is the last stable ver recommended for nook , so i am going to remake my card with that version. that should fix that prob
By: Anonymous on 11/24/2011
at 4:23 am
Did everything exactly as described, inserted my microSD card. turned on my NC. It just booted into normal NC. Did I do something wrong? What obvious step did I miss?
By: Jim on 11/26/2011
at 7:35 pm
Using 7.1.0 with gapps-db-20110828-signed.zip seems to cause boot from normal NC. It boots from Android if gapps is not copied to the microSD card. Still working on a solution for gapps.
By: Anonymous on 11/27/2011
at 3:22 pm
I’m using update-cm-7.0.3-encore-signed.zip and the other files in the root directory are MLO, u-boot.bin, uImage, and uRamdisk. I’ve tried booting it with both gapps-db-20110828-signed.zip present and not present. This makes me ponder if winimage is not writing the .img file correctly.
Nook Color model # BNRV200 software version 1.3.0
By: Jim on 11/27/2011
at 4:37 pm
You might try re-formatting the sdcard before using WinImage to write the .img file. In my case, I previously had another version of Android (Honeycomb, which seemed slow to me) on the sdcard and needed to do the re-format. But I tried with/without the gapps file several times and results were consistent (with gapps, NC booted from sdcard the first time, but not the second; without gapps, NC booted from sdcard first and second time and ran fine sans gapps).
By: Anonymous on 11/28/2011
at 1:28 am
I reformatted between attempts
By: Jim on 11/28/2011
at 6:47 am
I just got my nook color, and root this onto a 16G micro sd card, then turned on the nook. It completed all the steps and powered down. After that, I was unable to power the nook up again. Took out the sd card and had to push the power button a while for the original nook to turn on. Check the sd card, all the files are there.; Can anybody help and tell me what is the problem?
Thanks.
By: John on 12/01/2011
at 11:56 pm
Same problem here with 16gb sd card. Perhaps we need smaller sd cards?
By: Anonymous on 12/02/2011
at 11:41 pm
Same problem here: I followed the steps about 5 times, but each time, after the install sequence finishes and the NC powers down, it won’t power up again. At least, it won’t do so with the SD card installed. But (same as John, above) if you take out the SD, and push the power button for a while, the NC OS comes back on. 16gb card. I updated to NC OS 1.3.0. I used a Mac, and the 7.1.0 Encore ZIP. Stephen, even though I can’t get it going, thanks (!) for all you have done here.
By: Joe Brennan on 12/07/2011
at 8:50 pm
Hey, all, I think I figured this out. I think you need to install the OS (I used the most recent nightly build, #253) .zip file by itself – don’t do the OS and the GAPPs .zip at the same time. CM 7 is working … I’ll try and install the apps now. I also used an 8GB card (instead of the original 16), but don’t know if I need it. Thanks!
By: Anonymous on 12/09/2011
at 2:43 pm
I would like to now copy my working micro sd to a larger capacity card. Is there a particular copy program or technique I can use? Thanks!
By: Eldon on 12/06/2011
at 5:04 pm
I have the same issue as Eldon (see above post). I have an 8GB card working well but want to go to a 16 or 32 GB card. Copy help would be much appreciated.
Thanks,
John
By: JohnDur on 12/06/2011
at 5:36 pm
Hi, John…
I finally copied my card by using Winimage and, first copy a virtual hard disk image, and then restore the virtual hard disk image. It gives you the option of restoring to a fixed size or a variable size and I chose variable size presuming that it would allow use a a larger card. Anyway, it works! It does take a while as the image is as big as your original card is.
By: Eldon on 12/11/2011
at 6:09 pm
Excellent tutorial! I just created 2 cards for Nooks for my kids for Christmas. I elected to install Cyanogenmod 7 version 7.1. Thanks to Jay K for the heads up about increasing the partition size. It worked flawlessly!
By: C Gee on 12/08/2011
at 6:38 pm
I hope I’m not asking a question that I’m missing in the comments. I’m trying this process on a win7 netbook. the Winimage process appears to work, but it formats my 8 gig sd card as 128 meg, and, of course, fails during the install on the Nook. Should I be formatting the SD card before restoring the img file.
By: ronald long on 12/08/2011
at 11:54 pm
I solved my problem. The default 128 meg boot partion that Winimage creates is too small for the boot partition with both Android and Google apps. I made it larger (and had an additional failure when I made it too large, and didn’t leave enough space on the card for the Android install) using the EaseUS partition manager (http://www.partition-tool.com/download.htm) mentioned in a comment above.
By: Anonymous on 12/09/2011
at 2:47 pm
I am having some difficulty that’s been described previously, that the NookColor won’t power up after the installation of the SD card. I’ve tried two cards (SanDisk). My NookColor was updated with the latest BN update to (their) Android 1.3, and I’m working from a Mac.
The instructions were very easy to follow, and everything worked, up to the point where I should have been able to power on the Nook after the initial installation. I’ve tried with both cards at least twice, and two versions of CynogenMod (7.0.3 and the latest 7.1).
Anyone have a similar experience, and suggestions?
By: Anon on 12/10/2011
at 6:53 am
Hey, I had the same problem. I think you need to install the CM7 OS zip first, by itself. After it is installed, connect your SD to your mac again and copy the gapps zip into the boot partition on the SD. Put sd back into the nook, power up, then you you need to
By: Anonymous on 12/10/2011
at 11:21 am
Sorry, then you need to reboot in restore mode, which you can do a couple of ways. Easiest way may be to long press the power button, and find the restore option from the reboot choices. When it rebootsit will install the gapps zip. Then download the nook tweaks app from the app store, to overclock the CPU. Good luck!
By: Anonymous on 12/10/2011
at 11:28 am
sorry again … you need to reboot in recovery mode,not restore…..
By: Anonymous on 12/10/2011
at 11:31 am
Mine says Permission denied when I try the dd code… What should I do?
By: Corey on 12/12/2011
at 2:26 pm
Are you using as su?
By: glasskeys on 12/13/2011
at 12:30 pm
Thanks for all the steps. However, I am having a problem for which I do not find a solution in the postings. I got a 16GB micro-sd card class 10. and went through the steps of getting CM7 installed. It is all successful. It even getsto the point where it turns the nook off. at the end of the install.
However, When I power up after the cm7 install, all I get to is the initial splash screen of CM7 and thats it. It does not go beyond that splash screen.
there is the animation where the arrow turns around and around and stops.
Once it stops, the splash screen starts the animation again.
I do not have the google apps package copied/installed. as some of the postings have indicated it might bea source of some startup problems.
I have also tied using easeus to resize the partition assuming it was a partition size problem. But no luck.
So I would appreciate if anyone has any pointers as to what the problem might be.
(is a 2GB card big enough to try a trial install? is 16GB too big as one of the postings indicates that maybe 8GB is as big as it can get.?)
Thanks for all the helps
By: Ramdev on 12/12/2011
at 2:29 pm
Oh!. During the install service I do get some errors that might indicate a bad sd card. But to the contrary, all tests I run on a mac and a PC indicates the sd card to be just fine.
bad sectors messages and such…
By: Ramdev on 12/12/2011
at 2:44 pm
If anyone is interested, I think my problems were due to a bad micro SD card. Here is what I did… I fiund a 2GB PNY class 2 microsd card and followed the steps to get CM7 setup on the card. Inserted it into Nook color and viola it booted up without any errors. During the initial bootup/CM7 install process, I did not notice any disk errors either. which prompt me to think that maybe the bad sector messages were causing the continuous loop of the initial CM7 splash screen.
By: Ramdev on 12/13/2011
at 9:45 am
Its confirmed. It was a bad micro-sd card that for most general use, worked, but did show faults during the install process. I exchanged the card for a PNY class 10 16GB card and it worked like a charm the first time out.
Thanks to all for posting their experiences…
By: Ramdev on 12/14/2011
at 9:55 am
Hello, I followed the guide here pretty much perfectly I think with a 32 GB sdcard. I got all the way through the installation to were it flushes the cache for awhile, then powers off.
When I turn my nook back on it then loads straight into B&N’s software seemingly ignoring whats on the sdcard. What the heck is going on?
By: Internet151 on 12/13/2011
at 2:18 am
Windows? How big is the boot partition? Did you see any out of space messages before the flushing cache message?
By: ronald long on 12/13/2011
at 9:24 am
I was having the same problem with CyanogenMod v7.1.0. Once I tried v7.0.3 everything went as expected.
By: Miguel Sousa on 12/24/2011
at 5:39 pm
so i did all the4 steps and made the disc, when i get my NC tomorrow i just pop that SD in there and boom that bad boy works. when i turn it off and pull the disc out its back to the normal NC right??
By: thomas rogers on 12/15/2011
at 6:17 pm
Any idea why I can’t get the Nook app on here? I havent found it on the tablet, and the market says it is incompatible.
By: Chris on 12/16/2011
at 2:47 am
Best tutorial out there. Make sure you have the RIGHT sd card with at least 8gb free space. Otherwise it will not work. Trust me, I went through 4 of them.
By: Corey on 12/16/2011
at 3:42 pm
I had success with the two cards I tried, a Lexar 16GB Class 6 and a SanDisk 8GB Class 4, but I had to use CM version 7.0.3 instead of the latest 7.1.0.
Installing CM 7.1.0 went as expected, but the nook would not reboot at all when the 16GB card was in, and with the 8GB card it would always reboot into B&N’s software.
By: Miguel Sousa on 12/24/2011
at 5:51 pm
when i first put it in my nook opened that page you were talking about with the penguin. when i rebooted my nook it rebooted into the nook software. please help me here ive been working at this for a month. thanks nolton.
By: nolton on 12/26/2011
at 5:53 pm
Nolton,
Two factors most readers have encountered: Using this technique, ensure you use the 7.0.3 version & secondly the card chosen cannot have any r/w errors.
Cheers, Stephen
glasskeys.com — The resource for touchscreen computing fanatics.
By: glasskeys on 12/27/2011
at 9:31 am
I have tried two different SD cards, both with the same result. I boot from SD and get the installation process as described in the write up, but after it powers off I restart it and it boots to Nook OS rather than from the SD. I used Winimage to recover image to the SD card, then drag and drop the other zip files to the SD card. Is there something I am missing? Any fixes would be great.
By: Nucks99 on 12/26/2011
at 6:35 pm
Ok, just answered my own question. I needed to go with 7.0.3, rather than 7.1.0. now im up and running well so far
By: Nucks99 on 12/26/2011
at 6:58 pm
I had the same issue, how do you remove the boot partition from the sd (that isn’t in your nook) when you were done?
By: Girdnera on 01/03/2012
at 8:25 pm
I solved my own issue by umounting the partition and then deleting it using the disk utility in linux.
By: Girdnera on 01/03/2012
at 9:28 pm
i have tried to bulid cm7 on sd card and everything goes great it runs caches and reboots to cm7 and comes to the screen to set up but touch screen does work any suggestion?
By: david on 12/28/2011
at 1:24 pm
I am having the same problem, I have tried both a scandisk 4g class 4 and an scandisk 8g class 4. Has anyone come across the same problem and fixed it?
By: a different Stephen on 07/13/2012
at 11:44 pm
im back and i loaded 7.0.3 and it came up to the android symbol and it would not load please reply, nolton
thx!!!
By: nolton on 12/28/2011
at 6:05 pm
This is fantastic! Thanks for all your help and time writing this!
By: David Messinger on 12/28/2011
at 10:09 pm
This is really awesome and i got it working perfectly exept when i get past the linux screen and the boot screen it asks me to complete the install using one of the programs. Now what i dont understand is that my touch screen doesnt work ive tried nook honey atleast 3 times and i thought this one would work but it still has that touch screen problem but the buttons all work. when i take the sd out and reboot the touch screen works just fine sooooo pllleeaassee help me! P.S your steps are very well done and easy :)
By: Anonymous on 12/29/2011
at 11:30 am
I’m trying to do this over Ubuntu. However, once I do the “dd” command, the file transfers correctly, but the disk is then rendered unusable by everything I stick it into? Where’s my problem?
By: SonikkuAmerica on 12/29/2011
at 2:01 pm
I am having the exact same problem while trying this with Ubuntu.
By: Anonymous on 01/01/2012
at 10:57 am
Awesome, it finally worked.
I had an issue because I used a regular sized SD adapter in my laptops SD card slot, and the Nook wouldn’t boot off of the micro SD card. So then I purchased a micro SD USB adapter, and everything worked brilliantly.
By: Anonymous on 12/29/2011
at 5:24 pm
I have an issue with generic-sdcard, when I download the link you have provided onto my laptop the file name has changed to generic-sd.img automatically. Is this something I should be concerned with?
When I have followed the terminal instruction, using generic-sd.img instead, it changed back to generic-sdcard.img.gz and wrecked my SD card in the process. Now my Mac doesn’t see the SD card anymore.
What do I do? Thanks for your help and for your time. TC!
By: Shawn on 12/31/2011
at 12:17 am
Oh my gosh. My boyfriend figured it out for me!!! He said that the unmount disk is the issue. So we reverse engineered it and finally got it to work. So my sd card was not destroyed after all.
First, most Safari internet unzip your files for you automatically. To stop that, go to Safari, Preference, UNCHECK open “safe” files after downloading. You need to keep your downloaded files in .zip format.
Secondly follow the directions carefully to the letter.
Thanks anyways!
By: Shawn on 01/02/2012
at 1:00 pm
I am so frustrated!!!!! First I followed another website’s instructions and didn’t realize I had to unzip the first image file. After about an hour and reading tons of comments I figured that out. Then I follow the rest of the steps with my 16GB card. I get an error that says there is no partition. After doing a google search I found this site, and see it looks like it doesn’t like the 16GM card, so I switched to my husbands 8GM Class 2 SanDisk Micro SD. I formatted the card, and followed the directions again. Now it will not go into Boot mode, it just loads the Nook as usual, HELP!
By: Tina on 01/01/2012
at 8:15 pm
I have installed this on my Nook Color. I have been using CM 7.0.3. I get the Penguin scrolling screen and it turns off. Then when I turn it back on again it comes to a set up screen and it seems that the touch screen doesn’t work at ALL. No buttons work and all I can do is just turn it off. Any suggestions?
By: Joe on 01/02/2012
at 8:00 pm
Hi Joe,
I’m doing what you are doing and getting the same result… NO TOUCH SCREEN CONTROL at all. All I can do is power down. I did remove the gapps from the boot disk and just used the boot image and the CM7.0.3 file and got one step further into Andoid by reaching what appears to be a “desktop” screen with several folders for viweing available apps and changing the clock, but still no touch screen at all. Can ANYONE out there offer a solution???
By: Tom on 01/17/2012
at 12:58 pm
Joe… Did you ever solve your problem with no touch screen control?
By: Anonymous on 02/02/2012
at 10:22 am
When i get to the terminal part, after i type in the first command, it says that ”there is no file in directory”. What should i do?
Thanks
By: Eitan on 01/03/2012
at 3:57 pm
make sure that the cm7 folder is in your HOME directory – the one that has the little house next to it. You also need to make sure that the .gz file isn’t already unzipped. It seems that you need to unzip it through terminal for the file to be recognized later on.
By: Joseph on 01/03/2012
at 4:05 pm
thanks!
By: Eitan on 01/07/2012
at 4:19 pm
I am having some issues writing the image file using WinImage on Windows 7 (64 bit). Here are the other particulars:
– 8 GB SanDisk microSD
– USB reader/writer (that came with another SanDisk card) for computer/SD card interface
After going through the initial steps, Win Image launches an error message when attempting to write the image stating: “Error in writing disk. The process cannot acces the file because it is being used by another process.”
I tried with several other SD cards to have the same error appear. Does anyone have any suggestions?
By: Anonymous on 01/04/2012
at 9:31 pm
I also saw this a few times as I stumbled through the process. Be sure that you close down anything else that could possibly be accessing the file, including any Windows Explorer windows that are looking at the image. WinImage seems to be very protective and won’t let anything else be looking at the image file when it writes it to the disk.
By: Anonymous on 01/07/2012
at 7:34 am
Thanks for the tutorial – I had good success with a 16Gb Class 4 card. A couple of things that helped along the way were the detailed instructions for using WinImage and the comments from Jay K. I ran into the exact same problem where it ran out of space trying to install both CM7 and the Google Apps. Instead of changing the partition sizes, I got it to work by only just installing CM on the first pass and then installing GAPPS by rebooting into recovery mode.
By: Anonymous on 01/07/2012
at 7:49 am
I have a 16GB Class 10 SamSung card. I get an error in the Linux listing while it’s inflating the “update-cm-7.1.0-encore-signed.zip” file that there’s a write error due to there not being enough disk space.
Any ideas?
By: Anonymous on 01/10/2012
at 6:18 pm
I have noticed that a Class 4 card works better than a Class 10 card. In the past I used a SanDisk Class 10 card and I would get force closures all the time. I switched a SanDisk class 4 card and not a single force closure since then.
In the case of the nook color, faster reads (Lower class card, Class 4) is better for the boot off of a uSD card than a card with faster writes (Higher class card, Class 10)
By: Ramdev on 01/10/2012
at 6:25 pm
Ramdev,
I can believe it. Counterintuitively it appears that higher class rated sd cards can be worse. The theory is the rating is higher for cards that write *large* amounts of data quickly. Linux/Unix based systems have a need for cards that write smaller blocks of data quickly, which the higher rated cards are not necessarily quite as adept at doing as a lower rated card is.
Thanks for the feedback,
Stephen
By: glasskeys on 01/12/2012
at 9:56 pm
It is best to update your Nook color to the 1.4.1 stock update and register your device prior to doing any modifications to the device.
1. Download generic-sdcard-v1.3 img and unzip the file.
http://crimea.edu/~green/nook/generic-sdcard-v1.3.img.gz
2. Download update-cm-7.1.0-encore-signed zip file (CM7 stable).
Latest Version – CyanogenMod Wiki
3. Download gapps-gb-20110828-signed zip file(latest google apps).
http://download.cyanogenmod.com/get/…ore-signed.zip
4. Use SD Card Drive Format Tool to wipe drive and get a clean start.
https://www.sdcard.org/downloads/formatter_3/
use options:
Format type: Full (Erase)
Format Size Adjustment: ON
5. Download and unzip win32diskimager-binary folder to your computer
http://launchpad.net/win32-image-wri…ger-binary.zip
6. Burn the unzipped generic-sdcard image to sd card using Win 32Disk Imager.
7. Install SD partition manager epm.exe and run program
EaseUS Partition Master Home Edition – Free software downloads and software reviews – CNET Download.com
7.a. Use SD partition manager to partition Micro SD Card from 107MB to 150MB you have to hit apply once you make the change for it to take effect.
8. Copy update-cm-7.1.0-encore-signed and gapps-gb-20110828-signedzip files to SD card. *Do not change the file names.*
9. Power down Nook and insert SD Card.
10. Power on Nook and wait for CM7 boot program to run. You will see Linux Penguin and a bunch of scripts run and packages install.
11. Program will say install finished “It is safe to power off now” but wait until the screen goes blank.
12. Hold power button for 10 seconds to power down Nook.
13. Power up Nook.
14. You will see blue text Android followed by CM7boot screen followed by a choice of com.android.provision.DefaultActivity or Setup Wizard.
15. Choose Setup Wizard.
16. Touch the Android to begin.
17. Choose skip at google account.
18. Choose next use location.
19. Select time zone, check automatic then next.
20. Press the n button.
21. Then Menu>Settings>Wireless & networks>Wi-Fi settings and connect to your network.
22. Once connected use the Back button twice.
23. Choose Accounts & sync from the menu. Add account>Google.
24. Choose next.
25. Sign in with your Google account.
26. Click OK.
27. Select the Google apps to install (recommend Gmail, Google Maps, Google Voice and YouTube). Click OK.
28. Click Accept.
29. Click each selected app to download it.
30. Choose if you want to use backup & restore, click next.
31. Click Finish setup.
You have now completed the major portion of the setup and can run CM7 J
Extra setup –
Menu>Settings>CyogenMod settings>Performance>CPUsettings>Max CPU frequency: 925MHz, Set on boot checked.
Menu>Settings>CyogenMod settings>Tablet tweaks>Choosesoft-buttons: add Home, set others to preference.
Menu>Settings>CyogenMod settings>Tablettweaks>Choose unhide button> Vol+ or Vol-
Menu>Settings>Applications: Check Unknown sources
Menu>Settings>ADWLauncher>Screenpreferences>Deskto p Columns: 8
Many thanks to J515OP, glasskeys, and everyone else for getting the first versions of this how to posted!
By: Anonymous on 01/11/2012
at 11:16 am
Impressive!
By: glasskeys on 01/11/2012
at 10:18 pm
nice post
By: tzah on 01/14/2012
at 4:56 am
Hi guys, I’m following this very simple and well written guide but it seems I’m failing at some point. I’ve successfully written the image on the microsd card, place both CM 7.1 (latest stable version) and gapps (also latest possible version) and after I power up the Nook with the card inside it the process begins, everything seems to goo just fine, at the end the device powers down. The problem is that when I power it on after that it boot the stock OS instead of CM. Not only that but it shows me that there is a memory card inserted and gives me the opportunity to explore it’s contents. I see all the files that have gotten out from those zips and stuff… What do I do wrong? The card is an 8GB Transcend class 6 if that’s a factor.
Thanks in advance!
By: Martin on 01/19/2012
at 3:13 pm
Update: I got it! It seems CM should be installed on it’s own and booted at least once and then the gapps zip should be put on the card and the device should be rebooted in recovery mode. Gapps install successfully and everything is just fine.
By: Martin on 01/19/2012
at 4:13 pm
I have a NC 1.41. I followed the (very good) instructions you have above and this is what happens: The penguin page shows up on power-up and it looks like CM (7.03) installs and then powers down. When I restart, the same thing happens, only faster. I am using an 8GB class 4 card. I also tried a 2GB class 4 card with the same result. I did this with 7.03. I also tried 7.1 on the 8GB card but it looked like some of the messages on the scroll said not enough memory.
By: Anonymous on 01/21/2012
at 6:10 pm
Follow-up: I Re-formatted the card and put only CM on it, following Martin’s post above. Cyanogen boots up just fine. After I play with CM for a while I will add the gapps zip file to the card and see if it works.
This is a great and easy to follow guide. Thanks glasskeys!
By: Dave on 01/21/2012
at 7:15 pm
This is the best step by step instructions I have seen on this topic. Does anyone know if this will work for the Nook Simple Touch?
Thanks
By: Anonymous on 01/24/2012
at 11:47 pm
It probably won’t due to speed, and especially video as is my guess it uses a radically different chipset to handle the eInk based display.
Thanks for reading,
Stephen
By: glasskeys on 01/26/2012
at 7:09 am
Thanx man for such a comprehensive setup sharing…….well m trying to do this on my nook color…from last so many day i ve watch all the video ony outube for this…but none of them work for me…..forsome reason my winimGe software is not able to write the imag file to sdcard though its 4GB card but…….i coldnt find the reason….but i do appriciate the effort of all you people out tnere…..keep sharing good things…..
By: aqua on 01/28/2012
at 9:28 pm
Will this install the CyanogenMod on the nook or just the SD card i want to dual boot CyanogenMod with the nook os but i dont want CyanogenMod installed on the nook just the sd card.
By: fiddlestixbob on 02/01/2012
at 5:03 pm
i have installed the img on the sd card and moved over CyanogenMod to the sd card but it still will not boot into CyanogenMod. I have tried it on both a 16g and 8G card. the nook boots but no CyanogenMod.
By: Anonymous on 02/01/2012
at 7:46 pm
i did everything and the screen is non responsive i am using 8gb sd class 4 pny card.could you tell why the screen isnt responding to apply the settings
By: kjl on 02/03/2012
at 5:46 pm
I read on another site that newer Nooks (purchased after 12/1/11) have an updated screen and require a different driver than is included with these instructions… Thats why everything works fine except the screen is unresponsive. If someone has updated this C mod 7 to include the latest driver I sure would like to know how to solve this because I’ve been sitting on 2 of them for 2 months now.
By: Anonymous on 02/03/2012
at 7:36 pm
You may have to manually change the pixel density. How onewould do that i do not know :( lok up changing pixel density for nook and cm7 iguess.
Hopethat helps
By: ramdev on 02/03/2012
at 7:50 pm
In the market there’s an app called Blade Buddy. I used to change the density, it works just fine.
By: Martin on 02/04/2012
at 11:03 am
I found that the most recent version of Cmod 7.1 must include the latest touch screen drivers because now the whole process works, HOWEVER,,, do NOT include Google Apps in the original boot procedure. It messes with the reboot and you end up back in B&N’s OS. Load the unzipped SD card image and the still zipped Cmod 7.1 as per the instructions, then after wards, take the mini SD card back to your computer and copy the google apps onto the card. After reinserting the card and booting from it, hold the power button in until the list of options comes up including “Reboot”. Choose “Reboot” and then “Recovery” mode. This will load the google apps and you are all set.
By: Anonymous on 02/07/2012
at 10:39 pm
Thank u SO MUCH for this… this was my problem…and thank u for these VERY SIMPLE instructions…simplest on the net! very straight forward…ordinarily I don’t have issues following directions but people have been making quite the MESS of this whole thing…FINALLY 2 days of hell is over…
By: September Christina on 03/02/2012
at 8:40 pm
ive tried this but once the nook builds the first time /i can no longer access my /sd card unless it is in my nook i put it in the root of the sd card but it will not isntall google play at all says not found on the recovery boot help!!!
By: josh goodman on 05/22/2012
at 1:58 pm
I have a question. So far I’ve been rocking the CM7.1 on a Transcend class 6 8GB microsd card and I’m pretty pleased with how the device is responding, but after reading almost everywhere that if wanted enhanced performance SanDisk class 4 is the right sd card I just couldn’t keep myself from buying one. The thing is that I already have set up the android in the exact state I want it to be in (apps, settings, etc.). My question what is the best way to clone the contents from my current bootable microsd card to my new SanDisk one? I tried doing it by making an image with WinImage and then restoring it on the SanDisk, but for some reason it given me some error (error 27 the drive cannot find the sector requested) at 99%. The card is OK, because I managed to create a new CM bootable version on from scratch, but I don’t want to go through installing applications and configuration them all over again.
If someone can help me with this, please do, I’ll be very grateful!
By: Martin Tzonev (@Tzonev) on 02/04/2012
at 11:15 am
I rebooted the NC and after the CyanogenMod7 logo screen, it brought up a prompt titled ‘Complete Action Using” and it wants me to select either com.android.provision.DefaultActivity or Setup Wizard.
Which do I chose?
By: Tech21 on 02/26/2012
at 6:20 pm
Also, I the touch interface is not responding whether I chose one or the other, so how would I select the correct option?
By: Tech21 on 02/26/2012
at 6:23 pm
Does this work for Nook Tablet as well? I just tried and when I start up my Nook Tablet after popping in the SD, it just goes straight to the native Nook boot sequence…
By: Anonymous on 02/27/2012
at 6:06 pm
i did all that was said to do and my nook still boots the origanle softwear.
what am i doing wrong all the files appeare to be where they should be.
By: wayne on 03/16/2012
at 3:22 am
I followed your instructions and everything worked smoothly–unlike when I tried to create the bootable card with Windows–The only problem was the boot partition was too small to copy both the update file and the GAPPS file, so I only put the update on.
So, now that I have my Nook up and running on Cyanogenmod7, how do I install Google Apps?
By: Edwin on 03/16/2012
at 5:23 pm
Okay, solved my own problem. I had the wrong GAPPS file and it was too large at 52mb. I downloaded the correct 6.2 mb file and everything’s fine.
Using a Samsung 16GB class 2 micro SD card with good results so far. I had the card laying around, so I decided to give it a shot.
Thanks again for your easy to follow instructions.
By: Edwin on 03/16/2012
at 11:32 pm
Edwin,
Thanks for the feedback!
Cheers,
Stephen
By: glasskeys on 03/17/2012
at 5:11 am
I guess I need alil help my 16 gb card keeps saying not enough space on card to write the image file ..I have also tried a smaller one still same problem but they both are empty I formatted them to make sure of this I don’t know why it wont let me put this on them any ideas as I’m stumpped
By: bonnie on 03/21/2012
at 5:15 am
WinImage wouldn’t work correctly for some reason. Used Win32DiskImager and everything worked out fine.
By: Anonymous on 03/31/2012
at 9:25 am
THIS IS AWESOME!!!!!!!! THANK YOU, THANK YOU, THANK YOU!!!!
By: dollsey74 on 04/14/2012
at 12:49 pm
Hello! Thanks for a great tutorial, but I am having problems burning the SD card with Lion. This is what I’m seeing in terminal. Any suggestions would be much appreciated!
/dev/disk0
#: TYPE NAME SIZE IDENTIFIER
0: GUID_partition_scheme *121.3 GB disk0
1: EFI 209.7 MB disk0s1
2: Apple_HFS Macintosh HD 120.5 GB disk0s2
3: Apple_Boot Recovery HD 650.0 MB disk0s3
/dev/disk1
#: TYPE NAME SIZE IDENTIFIER
0: FDisk_partition_scheme *7.9 GB disk1
1: DOS_FAT_32 NO NAME 7.9 GB disk1s1
unknown040ccedc6192:~ Trisha$ diskutil unmountDisk /dev/disk1
Unmount of all volumes on disk1 was successful
unknown040ccedc6192:~ Trisha$ dd if=/Users/Trisha/Desktop/NookRoot/touchnooter-2-1-31.img of=dev/rdisk1 bs=1m
dd: dev/rdisk1: No such file or directory
By: Trisha on 04/17/2012
at 9:02 pm
I’m no expert, but it looks as if your Trisha$ dd… ect. line is wrong. The file should be stored in your home directory, subfolder cs7 (the one you’re supposed to create). Then you use the first listed command line to tell it that folder is where to look. From there, you enter the dd line, only you put ONLY the name of the file (touchnooker.img). The terminal will already know to look in that sub-directory. Now, if im wrong on anything, I welcome correction, but this is what I did and it worked for me. Good luck!
By: Techice on 04/17/2012
at 11:16 pm
Worked flawlessly on my sister’s nook. Doesn’t work on mine or my friend’s. I get all the way through the linux screens, then power up the nook after shutdown, and it powers up into the nook OS, mounting the sd card like a normal sd card.
I’ve tried on a Mac and on Windows. On my sister’s nook, I had to use Win32DiskImager to install.
All 3 nooks are running the most current version (1.4.2?) of the nook system software.
By: Anonymous on 04/25/2012
at 5:27 pm
i purchased a nook with gingerbread flashed to the eMMC. yesterday, i flashed 4.0 ics to the nook via sdcard. long story short, it got stuck in the boot loop, reinstalled and rebooted to find my nook would only boot into clockwork recovery. since i couldnt find another answer, i started deleting things and unmounting (in CWR) and my nook shut off and wouldnt turn on. after a little searching, i relized i had formatted the boot file. so, i followed your instructions and the initial boot went flawlessly until the end of the Linux screen…now, stuck in the same thing! nook is still not responsive to attempts of powering on!!! what can i do?
By: Kenny on 04/27/2012
at 11:54 pm
I have done everything according to the tutorial, but after the install is complete and it shuts down, the nook boots to original nook os. what have I done wrong?
By: ssbelani on 05/01/2012
at 5:39 pm
i tried two other methods to dual boot my wife’s NC with no luck…your mix did the trick! thank you.
By: David Suycott on 05/08/2012
at 11:44 pm
Hey,
This is a great tutorial. Everything was easy to follow, but I am having trouble with the booting process. I followed everything as you said, but now when I boot my nook with the micro SD card, the code finishes with:
“All steps complete, flushing cache again.
Preparing to shut down.”
Then it shuts down. When I restart the nook with the Micro sd card, the same process happens, leading to the device shutting down. I can remove the Micro sd card and still have regular nook functionality.
Is there something I did wrong? I reformatted the card and ran through the tutorial again to double check myself, but I got the same results. If there is any help you can give me, I would really appreciate it.
By: Anonymous on 05/14/2012
at 4:23 pm
i need help. The setup never shows up, instead it goes straight to the homescreen, but the touchscreen doesn’t work. I can still change the volume, lock it, and put it in landscape. I have to hold the ‘n’ key and the power key to turn it off. Could somebody point me in the right direction?
By: Marikel on 05/29/2012
at 7:17 pm
Comments on Post
:By: Anonymous on 01/11/2012 at 11:16 am
1) Instruction 7/7a. I could NOT get EaseUS Partition Master Home Edition to see my SD card using my Win 7 Pro, 64bit on HP Laptop. Tried 2 Sandisk cards.
Used XP Home on an OLD desktop, and it WORKED. 150Meg Partition.
2) Actually used “update-cm-7.2.0-RC3-encore-signed.zip”. It WORKED great.
Working great so far (~24hours). Faster than v7.0.3 as part of original instructions.
Will work up to try CM9 soon.
Thank You all for the great work.
By: Thankful to Anonymous on 06/03/2012
at 3:07 pm
I did everything you said, but found WinImage hard to decipher. I did find a “how to” on their site, followed the directions, followed the rest of your instructions and got NOTHING! What could I have done wrong?
By: C. Cos on 06/22/2012
at 6:48 pm
anamardoll.com’s instructional videos helped and I got it to work, only my NOOK is very slow and not dual bootable. How can I make it dual bootable and run faster. Videos just won’t run!
Any help? Thanks!
By: C. Cos on 06/23/2012
at 1:10 pm
I finally figured it out! I had to divide the Cm7 installation and the google apps into two separate steps but I have made a fast running 8 gig n2a card for 12 bucks! it was worth the time and effort. Thanks Stephen for bringing all of this together. Too bad we can’t sticky the splitting the installation comment to the top that would have saved me a little frustration!
By: a different Stephen on 07/14/2012
at 1:11 am
every time i get to to dd if=generic-sdcard-v1.3.img of=/dev/disk2 bs=1m i get permission denied.. what am i doing wrong that i keep getting this same problem? please advise! thanks in advance
By: Juliana on 07/27/2012
at 8:43 pm
I don’t think you can install CM9 using this method. The zip file is too large.
By: neodroid on 09/05/2012
at 9:50 pm
dd if=generic-sdcard-v1.3.img of=/dev/disk1 bs=1m
After entering this, I get access denied. What is happening here?
By: Chris Marks on 09/05/2012
at 9:56 pm
Permission denied, excuse me
By: Chris Marks on 09/05/2012
at 9:58 pm
you must use ‘sudo dd if=etc’ from the commandline, linux/mac requires it
By: Anonymous on 12/11/2012
at 11:20 am
Keep trying to do this on a 16gb drive and it wont let me copy and paste the two files because it says the drive is full.
When I go to disk utility to see if I can make the partition larger it wont let me change it
By: Richard Griffin on 12/06/2012
at 5:13 am
hey thanks bro this was an amazeing tutorial it work the first time i tried no problems :D
By: rimzee on 10/03/2013
at 7:30 am
My chill project:
http://may.post1.telrock.org
By: kathyfm2 on 07/08/2018
at 10:04 am
Stared fashionable contract:
http://dean.w.telrock.org
By: denisebg3 on 07/29/2018
at 8:06 pm